iTriangle platform
Documentation to itriangle platform, differences between sets, sources, community etc.
- iTriangle HW overview
- What are the differences between each iTriangle set?
- Connecting iTriangle to a WiFi network
- How to connect iTriangle to a private WiFi network via Android/iOS APK
- How to operate the Huawei E5730s 3G/Ethernet/Wifi router
- TODO How to change WiFi network over Android/iOS APK
- FAQs
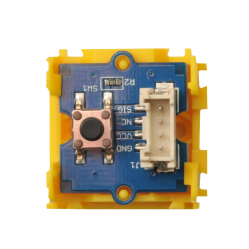
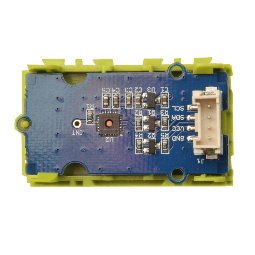
iTriangle HW overview
Hardware Overview

| Part | Function |
|---|---|
| MCU | ESP8266 |
| Digital Port 0 | GPIO 14 |
| Digital Port 1 | GPIO 12 |
| Digital Port 2 | GPIO 13 |
| Analog Port | A3 |
| UART Port | Pin 1 & Pin 3 |
| I2C Port | Pin 4 & Pin 5 |
| Status Light | Blue LED is the WiFi status indicator, Red LED indicates the working status |
| Configure Button | To configure and manage your iTriangle |
| Battery Holder | JST2.0 |
| Micro USB | To power the board or communicate with a PC |
| Reset Button |
To reset the MCU |
| General | Value | Power Management | Value |
|---|---|---|---|
| Size | 55mm * 48mm | DC Current Per I/O Pin | 12 mA |
| Crystal | 26 MHz | Input Voltage (Micro USB) | 5 V |
| Flash Memory | 4 MBytes (W25Q32B) | Input Voltage (Battery holder) | 3.4~4.2 V |
| Wi-Fi Network Protocol | 802.11 b/g/n | Output DC Current | 1000 mA MAX |
| Wi-Fi Encryption Technology | WEP/TKIP/AES | Operating Voltage | 3.3 V |
| Grove Connectors | 6 | Charge Current | 500 mA MAX |
| Flash | 4 MB (W25Q32B) | LifeTime of FLASH | 10.000 write cycles |
Pay attention to FLASH write cycle limits. Programs are stored in FLASH and each new firmware build or offline code update increases the internal write count. After the FLASH write limit is exceeded, the board will probably work well for the next few thousands cycles, but there is no legal warranty for exceeding the limit.
Status LEDs
Two status LEDs, blue and red, can be seen near the FUNCTION button. The blue LED indicates network status and has the following blink patterns:
![]() blinking slowly – configuration mode
blinking slowly – configuration mode
![]() blinking twice quickly, then off for 1s – requesting IP address from router
blinking twice quickly, then off for 1s – requesting IP address from router
![]() blinking once quickly, then off for 1s – connecting to the server
blinking once quickly, then off for 1s – connecting to the server
![]() on for 1s, then off for 1s – the node is online
on for 1s, then off for 1s – the node is online
![]() continuously on – the node is not available/has no IP/not connected to server.
continuously on – the node is not available/has no IP/not connected to server.
![]() blinking quickly (on for 100ms, then off for 100ms) – OTA
blinking quickly (on for 100ms, then off for 100ms) – OTA
The blue LED is connected to GPIO2, which is also the TX pin of UART1. When downloading firmware, the UART1 dumps the data transmitting on UART0 automatically. The Bblue LED will therefore blink while downloading firmware. After startup, the GPIO2 will be configured as a GPIO, not TX of UART1.
The red LED is another status LED and indicates the power status of Grove modules. The six VCC headers converge and can be controlled with GPIO 15. When the node is in deep sleep mode, all of the modules lose their power too. The red LED will light up when the modules are powered and switch off when modules are not powered.
Bonus!
iTriangle has an inbuilt LiPo battery charger. You can charge a 3.7 V LiPo battery with the JST 2.0 Port when connected by USB.
What are the differences between each iTriangle set?
The iTriangle sets are available in five versions. Each differs in the amount of construction blocks and smart items and has different uses. All iTriangle sets are precisely manufactured to meet STEM requirements and target different curriculums and markets.
The table below shows the main differences
| iTriangle Set | # of construction blocks | # of sensors | # of actors | type of master unit | target market | # of curriculum materials included |
|
iTriangle EDU set v1.0
|
320 pcs | 13 pcs | 6 pcs | iTriangle MASTER | Primary school | 15 complete classes with 45 task variations |
| iTriangle EDU set v2.0 | 322 pcs | 12 pcs | 6 pcs | iTriangle 4.0 online unit + display | Broad EDU, primary, secondary and university | 15 complete classes with unlimited variations + online coding |
| iTriangle START set | 214 pcs | 9 pcs | 7 pcs | iTriangle 4.0 online unit | Primary, secondary + free time activity centers | 30 tasks + unlimited variations + online coding |
| iTriangle STEM set | 166 pcs | 11 pcs | 3 pcs | iTriangle 4.0 online unit | Primary, secondary schools with an environmental focus | 10 tasks + unlimited variations + online coding |
| iTriangle Home set | 204 pcs | 5 pcs | 3 pcs | iTriangle 4.0 online unit | free time activity + home tutoring | 10 tasks + unlimited variations + online coding |

Base unit types
iTriangle MASTER
-
Control interface with a 2.8" touchscreen and integrated battery
-
Intuitive control with complete OFFLINE work – nothing more to connect
-
Export processed and evaluated data to MS Excel
-
Connect control components
-
Graphically display connected sensors and actors
-
Power bank 5600 mAh
-
Communicate with the Educational, Sensor and Actuator kits
-
Compatible with Lego bricks
The biggest advantage of this unit is standalone work. You don't need a computer to work with it and it is completely offline. The offline version has only one disadvantage. You can only use it for 15 complete classes prepared in advance for 45 variations in the curriculum. Other new classes have to be manually uploaded by computer. Five new classes are regularly deployed and uploaded for users.
iTriangle 4.0 online unit
This unit is the innovative iTriangle MASTER unit. It is delivered with an external power bank and three AAA batteries to power it. The power source is easily changed if it is empty. An optional 2.8" touch screen colour interface has the same functionalities as the iTriangle MASTER unit as well as free screens for use with your own prepared tasks.
The iTriangle 4.0 is an ONLINE unit and can be connected via WiFi to the internet and easily controlled with a web application. This software interface lets you control MAJOR features:
- Measure with several sensors at once and easily exporting data to MS Excel
- Easily download updates, new tasks and classes
- Unlimited variation in use. You can create your own experiments and easily program code in the Blockly coding environment
- Update code and disconnect from the internet to work OFFLINE
- Minimalist design. It can be used with many other small, final products
- Incorporates notions of the IoT and Industry 4.0 natively in school classes
- Motivates students to create their own code and think about how it works
- Online debug view for agile managed development
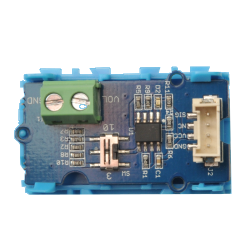
List of sensors and components in each set
The table below shows a list of items in each iTriangle set
| Name | iTriangle EDU set v1.0 | iTriangle EDU set v2.0 | iTriangle START set | iTriangle STEM set | iTriangle Home set | |
|---|---|---|---|---|---|---|
 |
4 in 1 sensor | 1 pc | 1 pc | 1 pc | 1 pc | - |
 |
Push button switch | 1 pc | 1 pc | 1 pc | 1 pc | 1 pc |
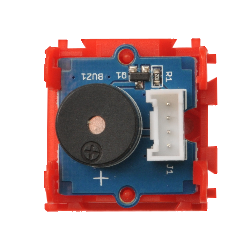 |
Buzzer | 1 pcs | 1 pc | 1 pc | 1 pc | 1 pc |
 |
Continuous servo 360 dg | - | 2 pcs | 1 pc | - | 1 pc |
 |
Hall Sensor |
1 pc | 1 pc | - | - | - |
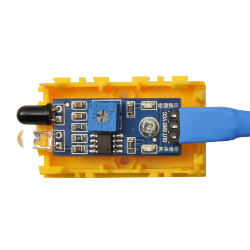 |
IR sensor | 2 pcs | 2 pcs | 2 cs | 2 pcs | 1 pc |
 |
LED matrix 8x8 | - | 1 pc | 1 pc | 1 pc | - |
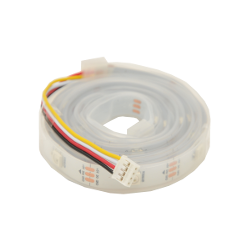 |
LED stripe | - | - | - | - | 1 pc |
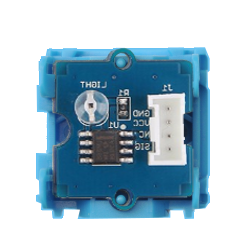 |
Light sensor | - | - | 1 pc | 1 pc | 1 pc |
 |
Luminance sensor | 1 pc | 1 pc | - | - | - |
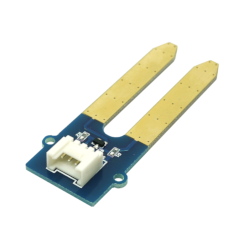 |
Moisture sensor | - | - | 1 pc | 1 pc | 1 pc |
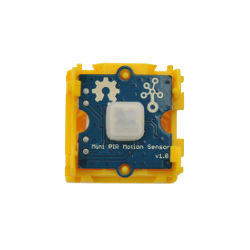 |
PIR motion sensor | - | - | 1 pc | 1 pc | 1 pc |
 |
High pressure | 1 pc | 1 pc | - | - | - |
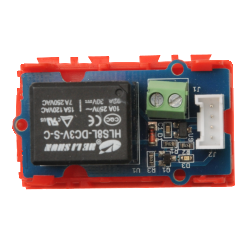 |
Relay | 1 pc | 1 pc | 1 pc | - | - |
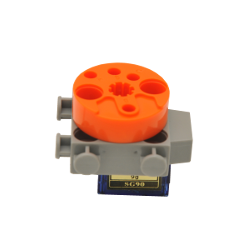 |
Servo 180 dg | 1 pc | 2pcs | 2pcs | 1 pc | 1 pc |
 |
Sound sensor | 1 pc | 1 pc | - | - | - |
 |
Thermometer | 1 pc | 1 pc | 1 pc | 1 pc | - |
 |
Temperature and humidity sensor | - | - | 1 pc | 1 pc | - |
 |
High accuracy temperature and humidity sensor | 1 pc | 1 pc | - | - | - |
|
Tone generator | 1 pc | 1 pc | 1 pc | 1 pc | 1 pc |
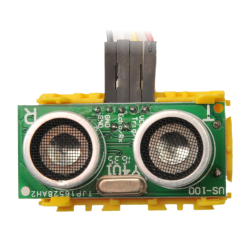 |
Ultrasonic ranger | 1 pc | 1 pc | 1 pc | 1 pc | 1 pc |
 |
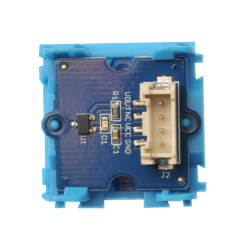
Voltage divider | 1 pc | 1 pc | 1 pc | 1 pc | 1 pc |
 |
Water pump | - | - | 1 pc | - | 1 pc |
Connecting iTriangle to a WiFi network
You can connect the iTriangle device to a network in two ways. Select the way that suits you best, and if you cannot connect, the reset switch will let you start again.
Connect to a predefined iTriangle network
Each iTriangle device is set up with a predefined WiFi network when it is delivered to the customer. It simplifies the process for the customer when first powering up. Some iTriangle sets include a Huawei E5730s WiFi router that also uses these settings.
If your iTriangle set comes with an Huawei E5730s router, you do not need to do anything to set up the network. All settings are set at the factory and you simply power up the iTriangle device and Huawei router. First read the Huawei guide on how to operate the Huawei E5730s router and learn what the indicators on the router mean.
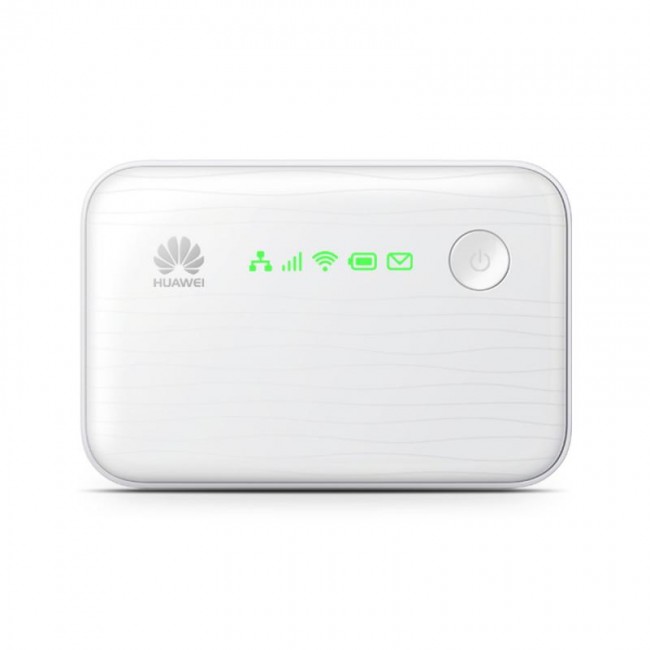
Note: the Huawei E5730s router can operate as a WiFi bridge for your LAN when it is connected to a LAN port or as 3G modem with WiFi hotspot when it is switched to 3G mode. Try connecting other devices such as notebooks and mobile phones to the iTriangle network with the Huawei E5730s in 3G mode, as Fair Use Policy limitations and high traffic can lead internet access being temporarily disabled.
If your set does not contain a router, you can create a WiFi network on your personal or school WiFi access point. Kindly ask your IT support to create a WiFi network with the settings below or manage these access point settings on your own.
| WiFi SSID | iot_network |
| WPAPSK key | itriangle1234 |
| WiFi security | WPAPSK |
Connect to any other WiFi network with WPAPSK security
If you don't have the option to create a dedicated iTriangle WiFi network, you can change the iTriangle WiFi settings to any available WiFi network with WPAPSK security. To change the settings of the iTriangle device, you will need to follow the guide HOW TO CONNECT ITRIANGLE TO WIFI VIA AN ANDROID/IOS APP. After you complete these four steps, your iTriangle WiFi settings will be changed to the ones you specify.
Note: this procedure has some limitations
- A setup application is only available for Android/iOS operating systems and can be downloaded from the store free of charge
- You have to agree privacy policies and allow Android/iOS APP to manage your WiFi connections, check your location, allow the store to access your credentials, etc.
- Anytime you activate the configure mode on an iTriangle device, the original factory WiFi settings are restored. If you are using your own WiFi settings, you will have set up new network access.
How to RESET the original factory settings
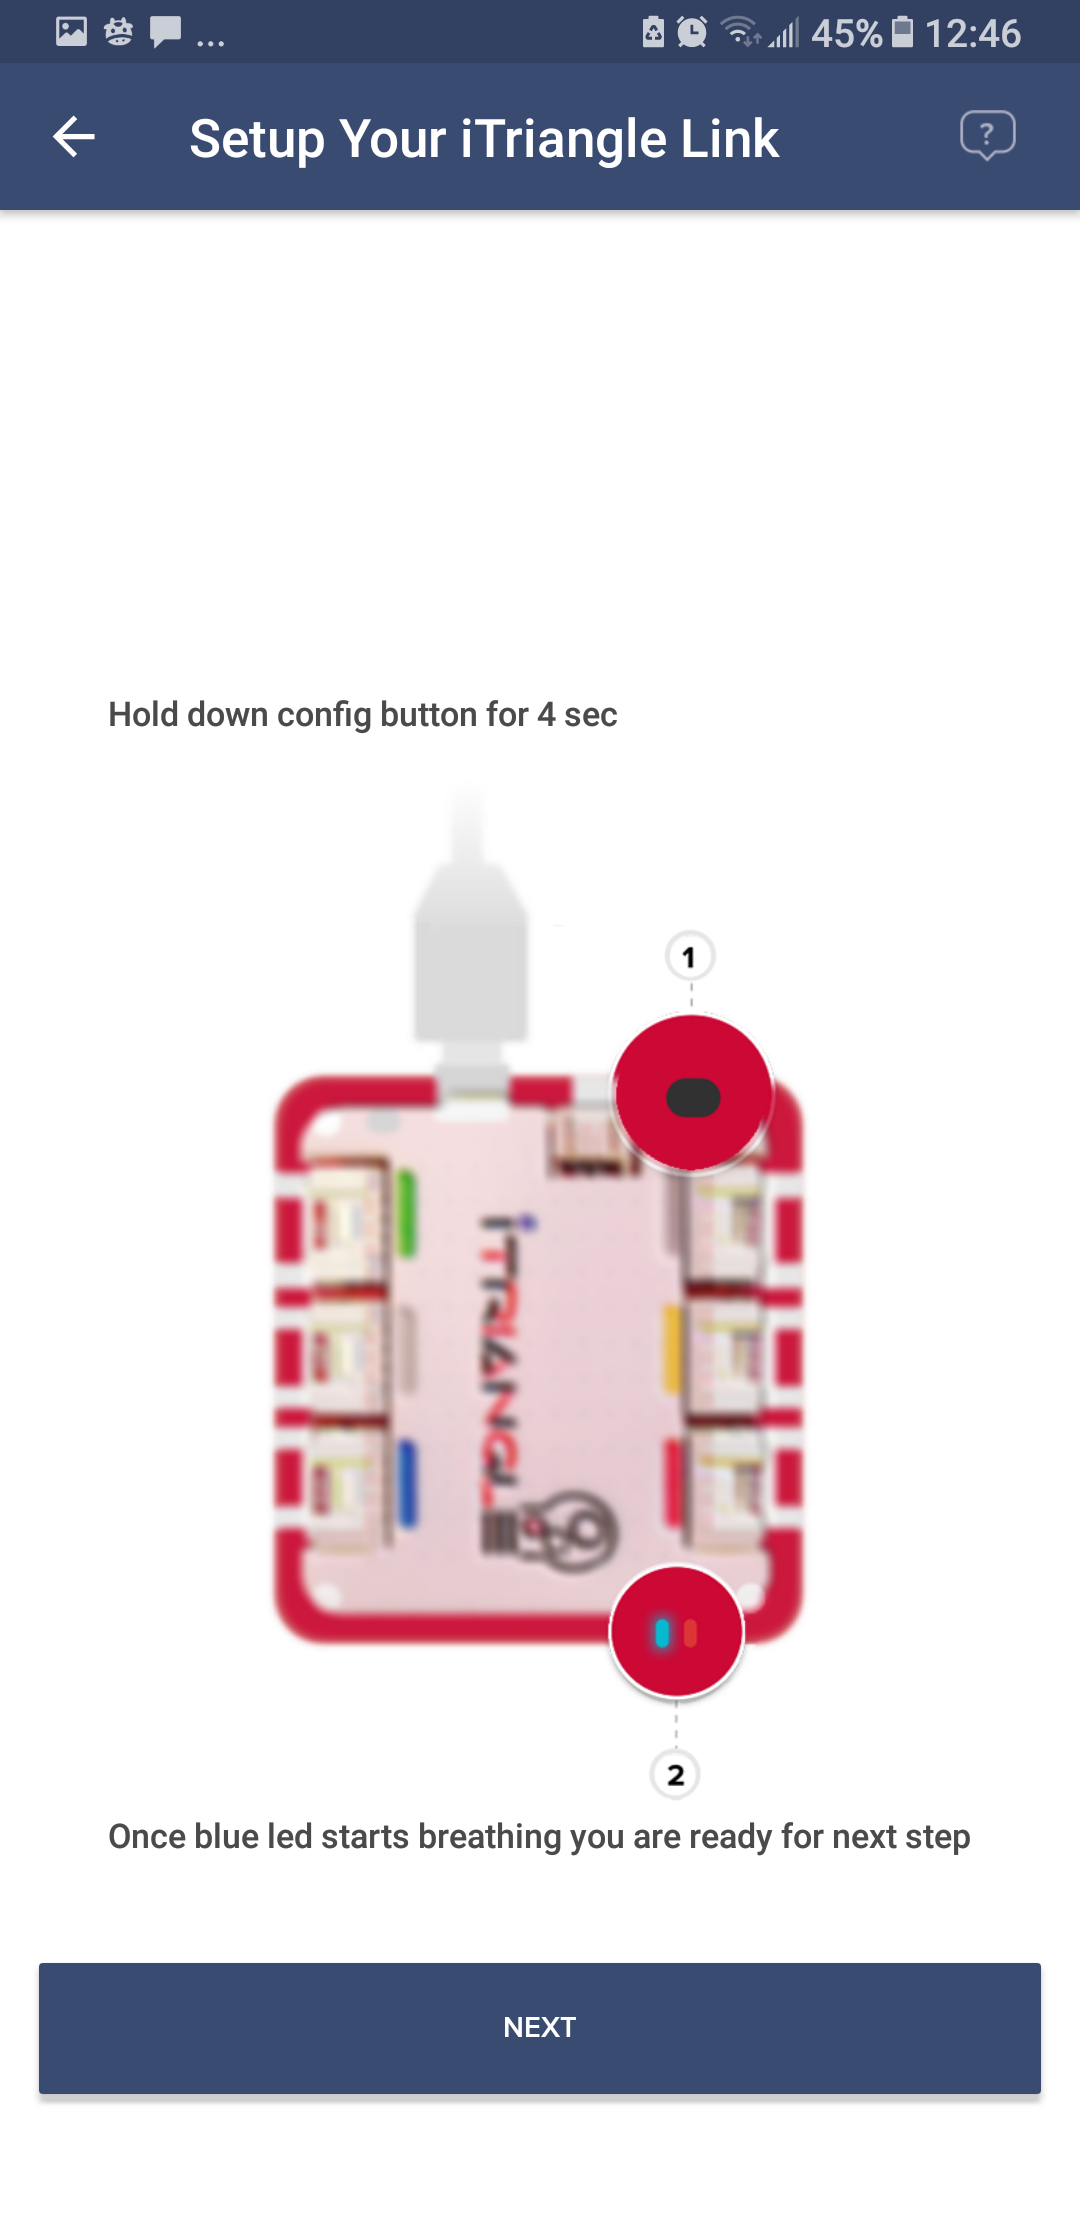
- Press and hold the CONFIG button until the blue LED turns into breathing mode (i.e., blinking with a fade in & fade out effect). It means that iTriangle has successfully switched to configuration mode and the original WiFi settings were restored to the iTriangle EEPROM.
- Press the RESET button once to reinitialize the original WiFi settings and then follow the normal connection procedure.
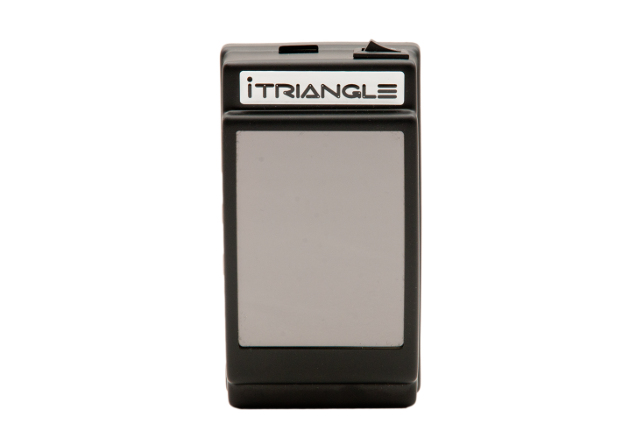
How to connect iTriangle to a private WiFi network via Android/iOS APK
STEP 1: Install the Android/iOS App
You must install the iTriangle App to manage and configure your iTriangle devices.
Download the Android or iOS App and install. Or, go to the App Store or Google Play and search for "iTriangle"to find it.
 |
 |
|---|---|
| Get Android App | Get iOS App |
Make sure your Android OS version is 4.1 or higher, or your iOS version is 7 or higher.
STEP 2: Create an account or use a predefined account
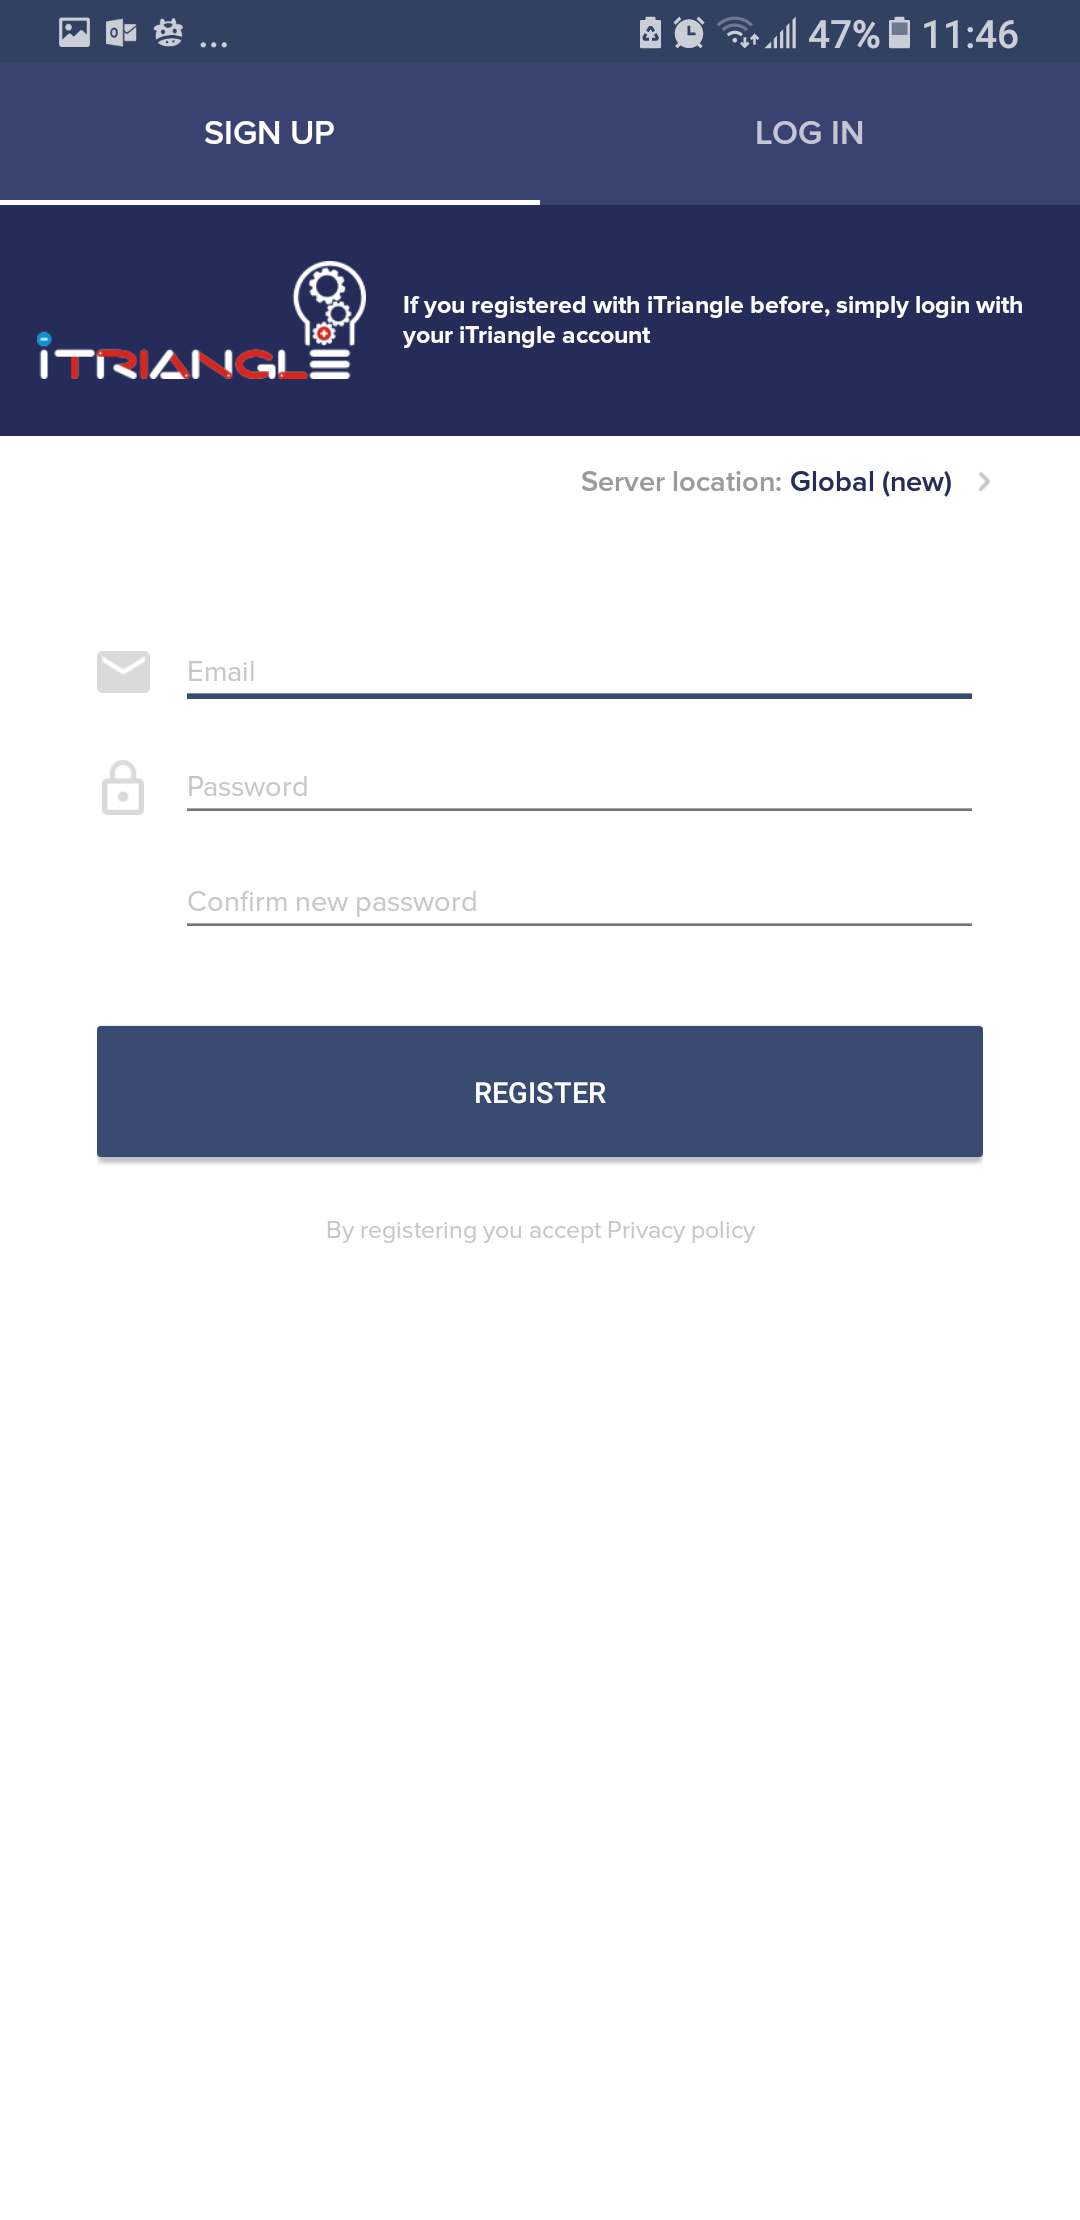
- If this is your first time using the iTriangle APP, you may be asked for GPS authorization. Please approve it, then sign up. This privilege is necessary for managing WiFi networks connecting to the iTriangle device.
- If you already have an account, check the server location before logging in.
Please make sure you enter the correct server location. An incorrect server location will not connect you to iTriangle.
 |
 |
 |
STEP 3: Connect to the iTriangle WiFi APP
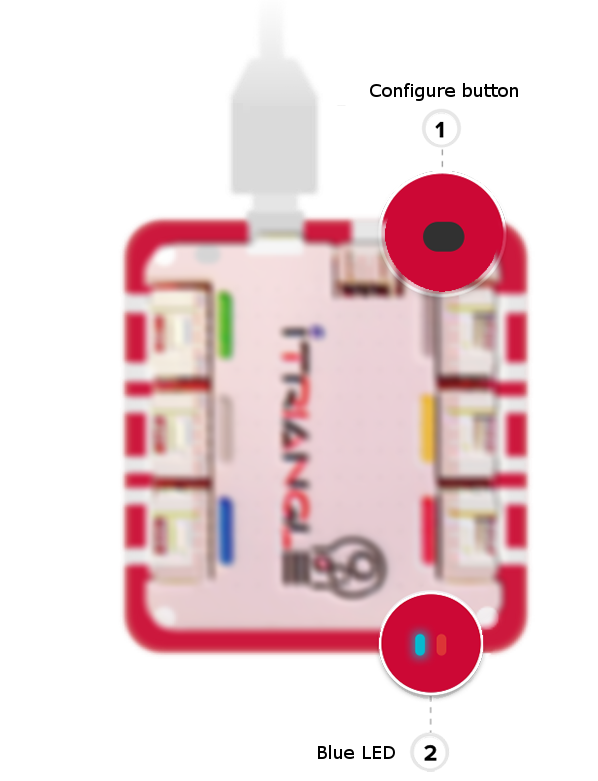
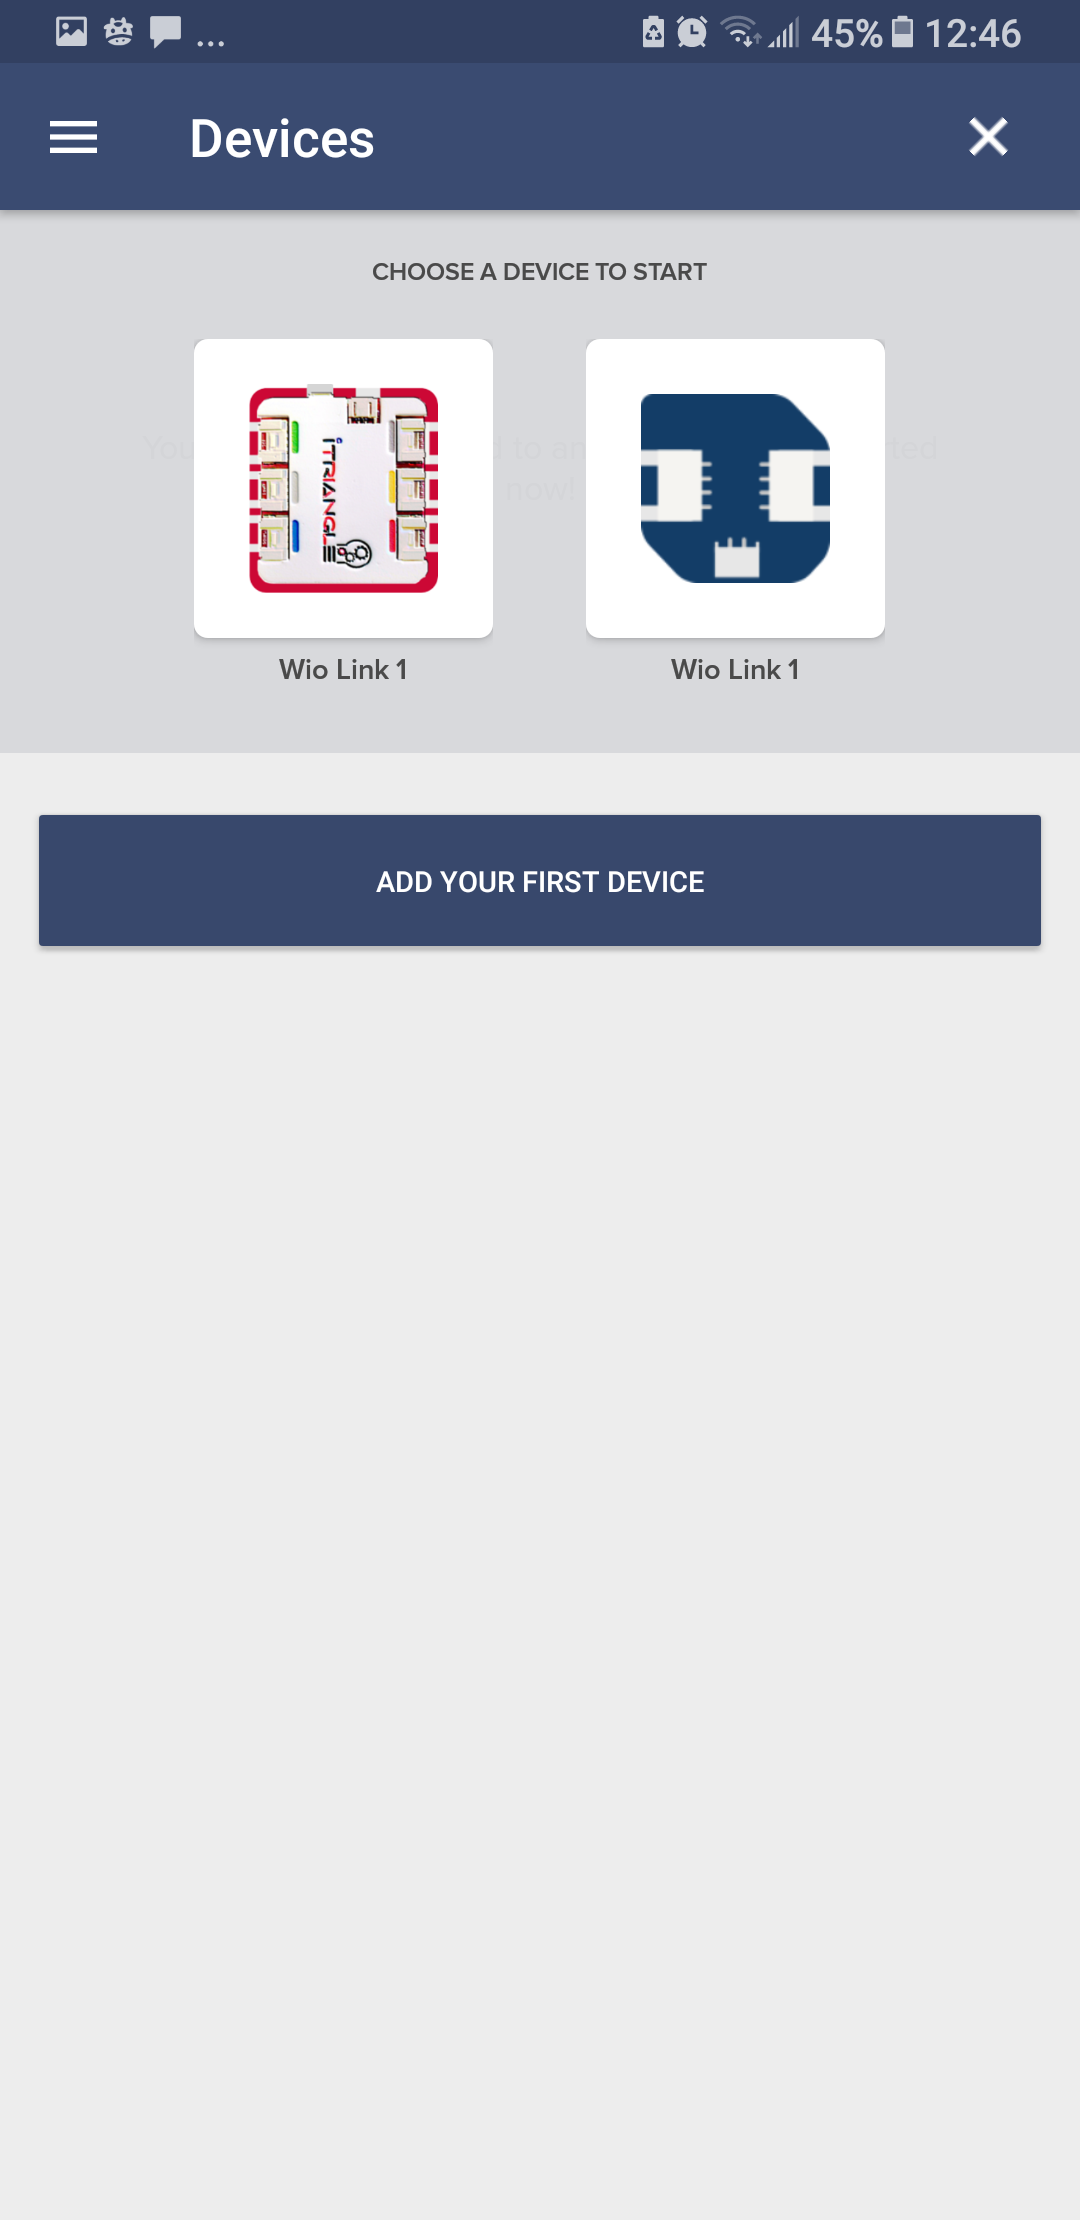
- Press and hold the CONFIG button until the blue LED starts blinking slowly with a fade in & fade out effect (breathing). This means that iTriangle has successfully switched to configuration mode and can be detected by the iTriangle App.
- Press "Add your first device".
- Choose an iTriangle device.
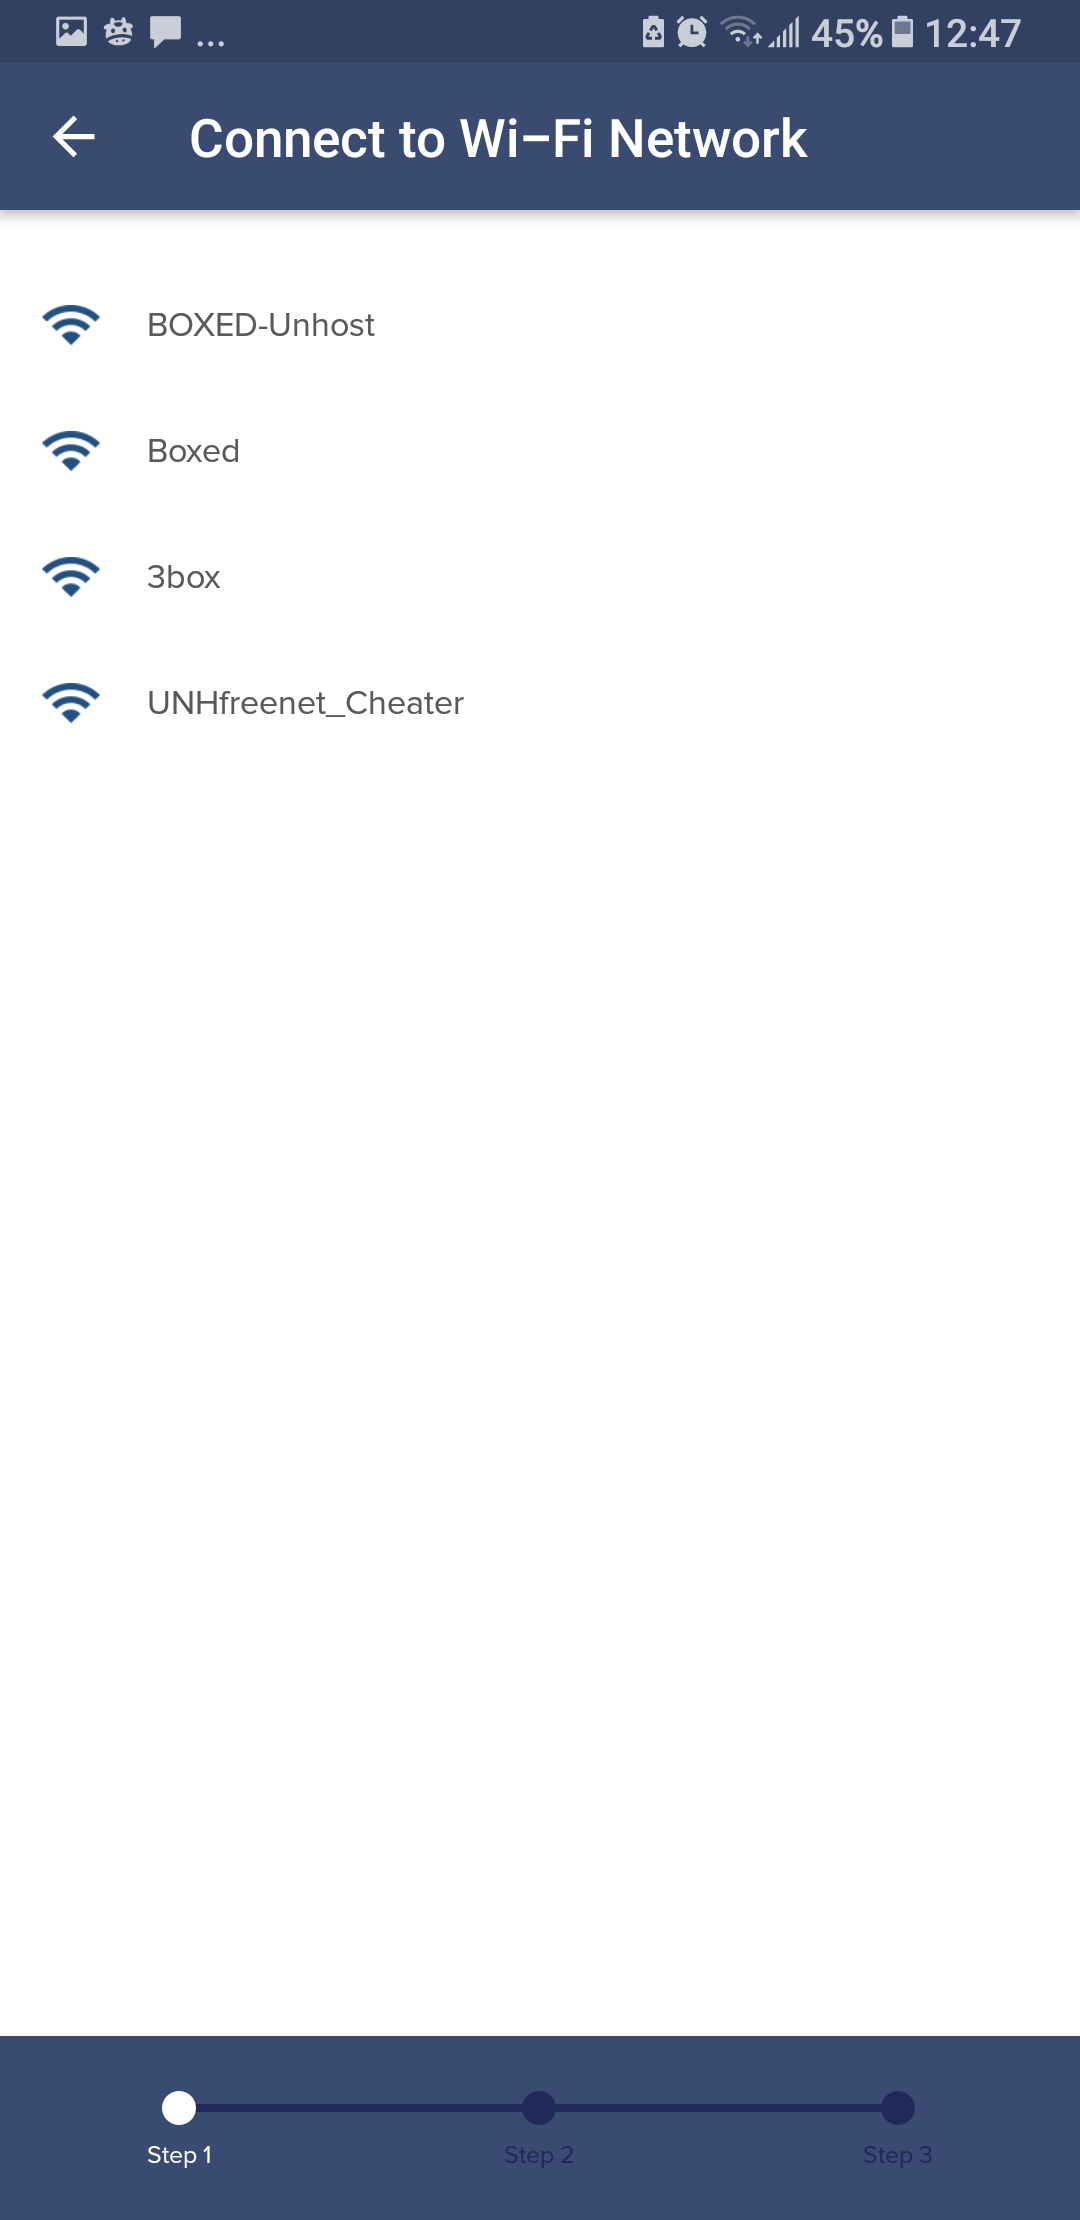
- "Go to the WiFi list", which will take you to the WiFi settings interface on your smartphone.
 |
 |
 |
- If you have successfully switched the device to configuration mode and the blue LED is blinking slowly (breathing), you will find iTriangle in the WiFi list. Connect to it! (It is not usually called "iTriangle" in the WiFi list. In the example shown, it is "iTriangle_8B2F12". You will find one called "iTriangle_xxxxxx" in your own list).
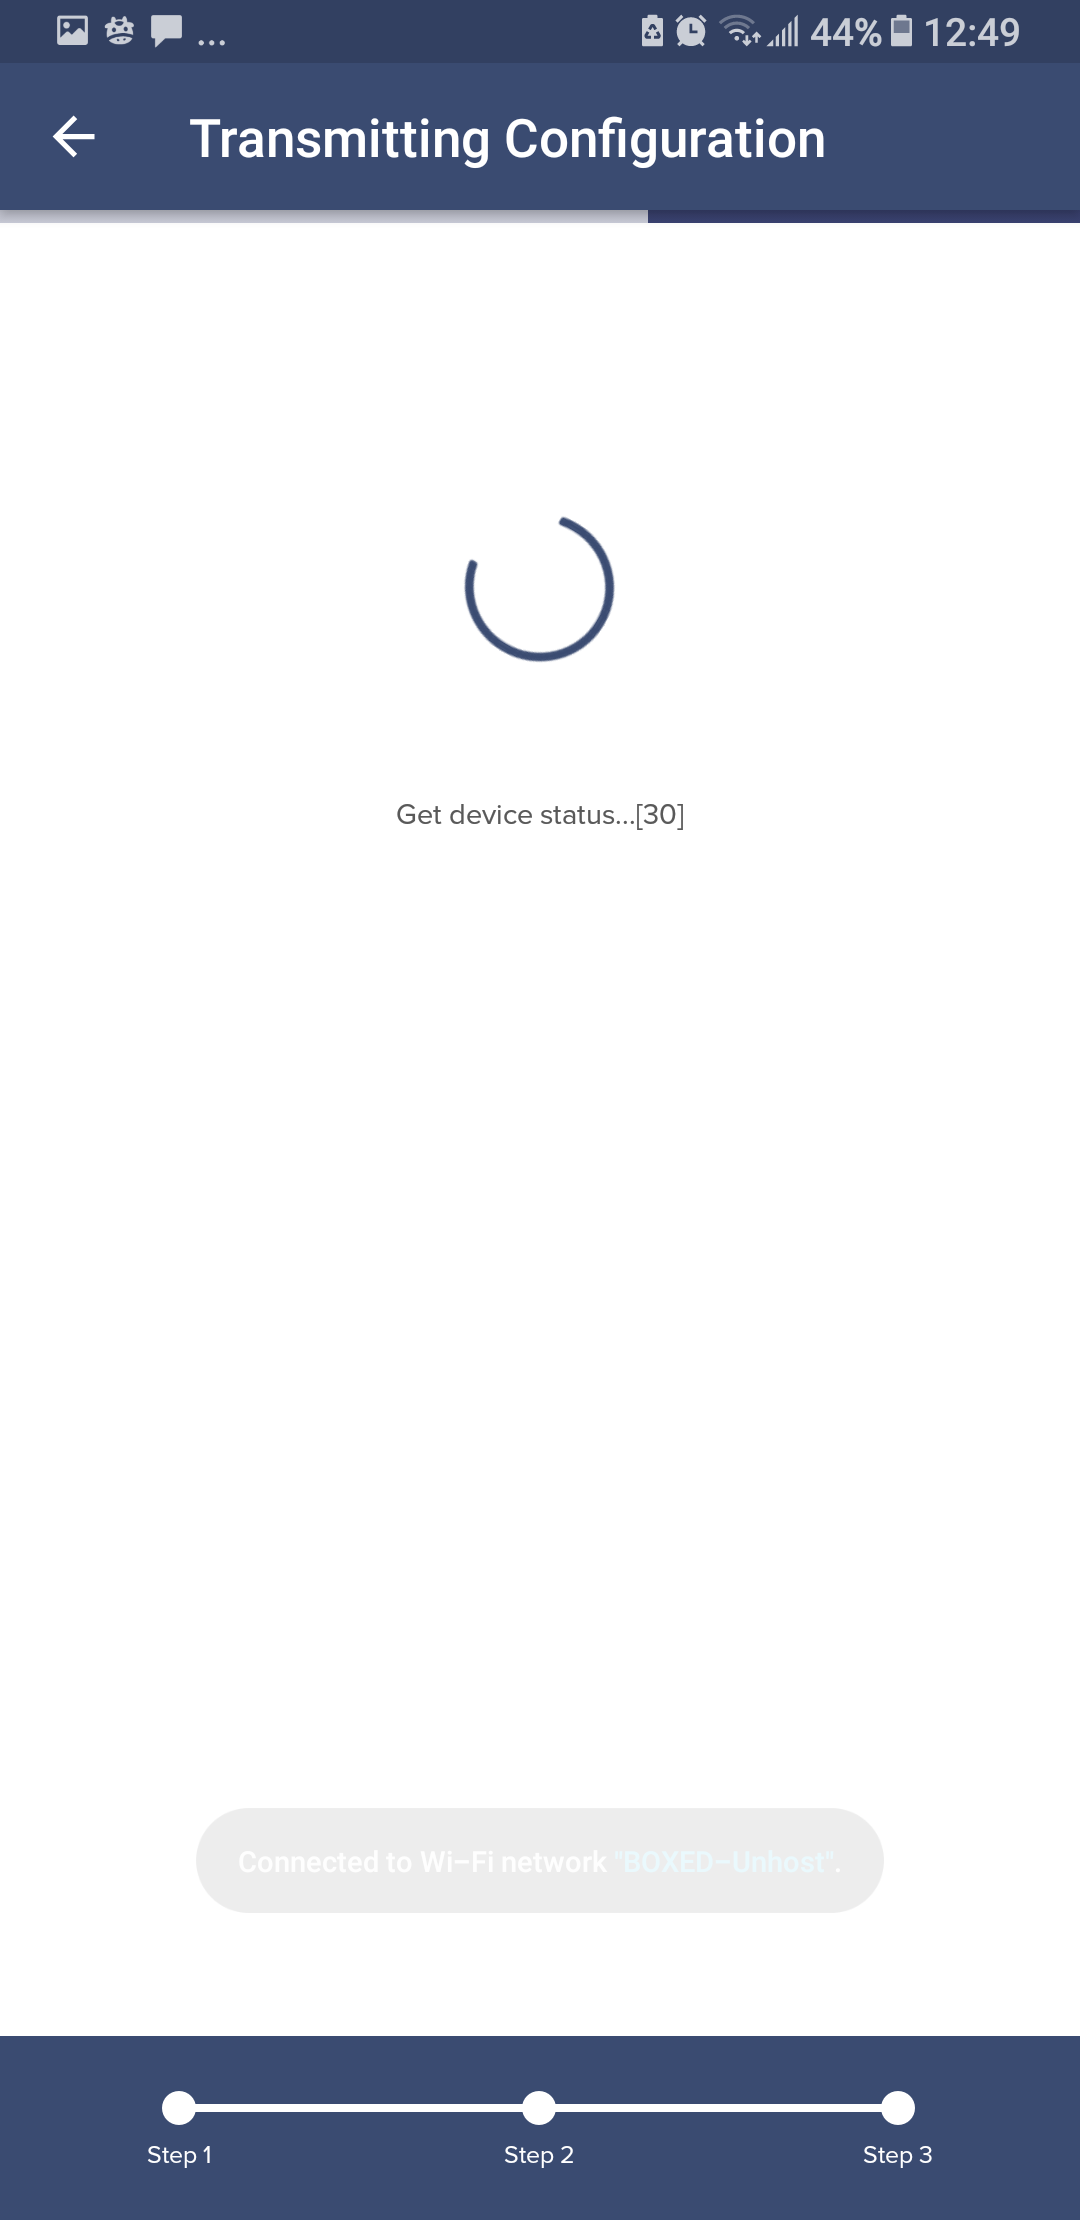
- As soon as you are connected, you will be notified and you can then go back to the app.
- The next step is to connect to the WiFi at your home or company.
 |
 |
 |
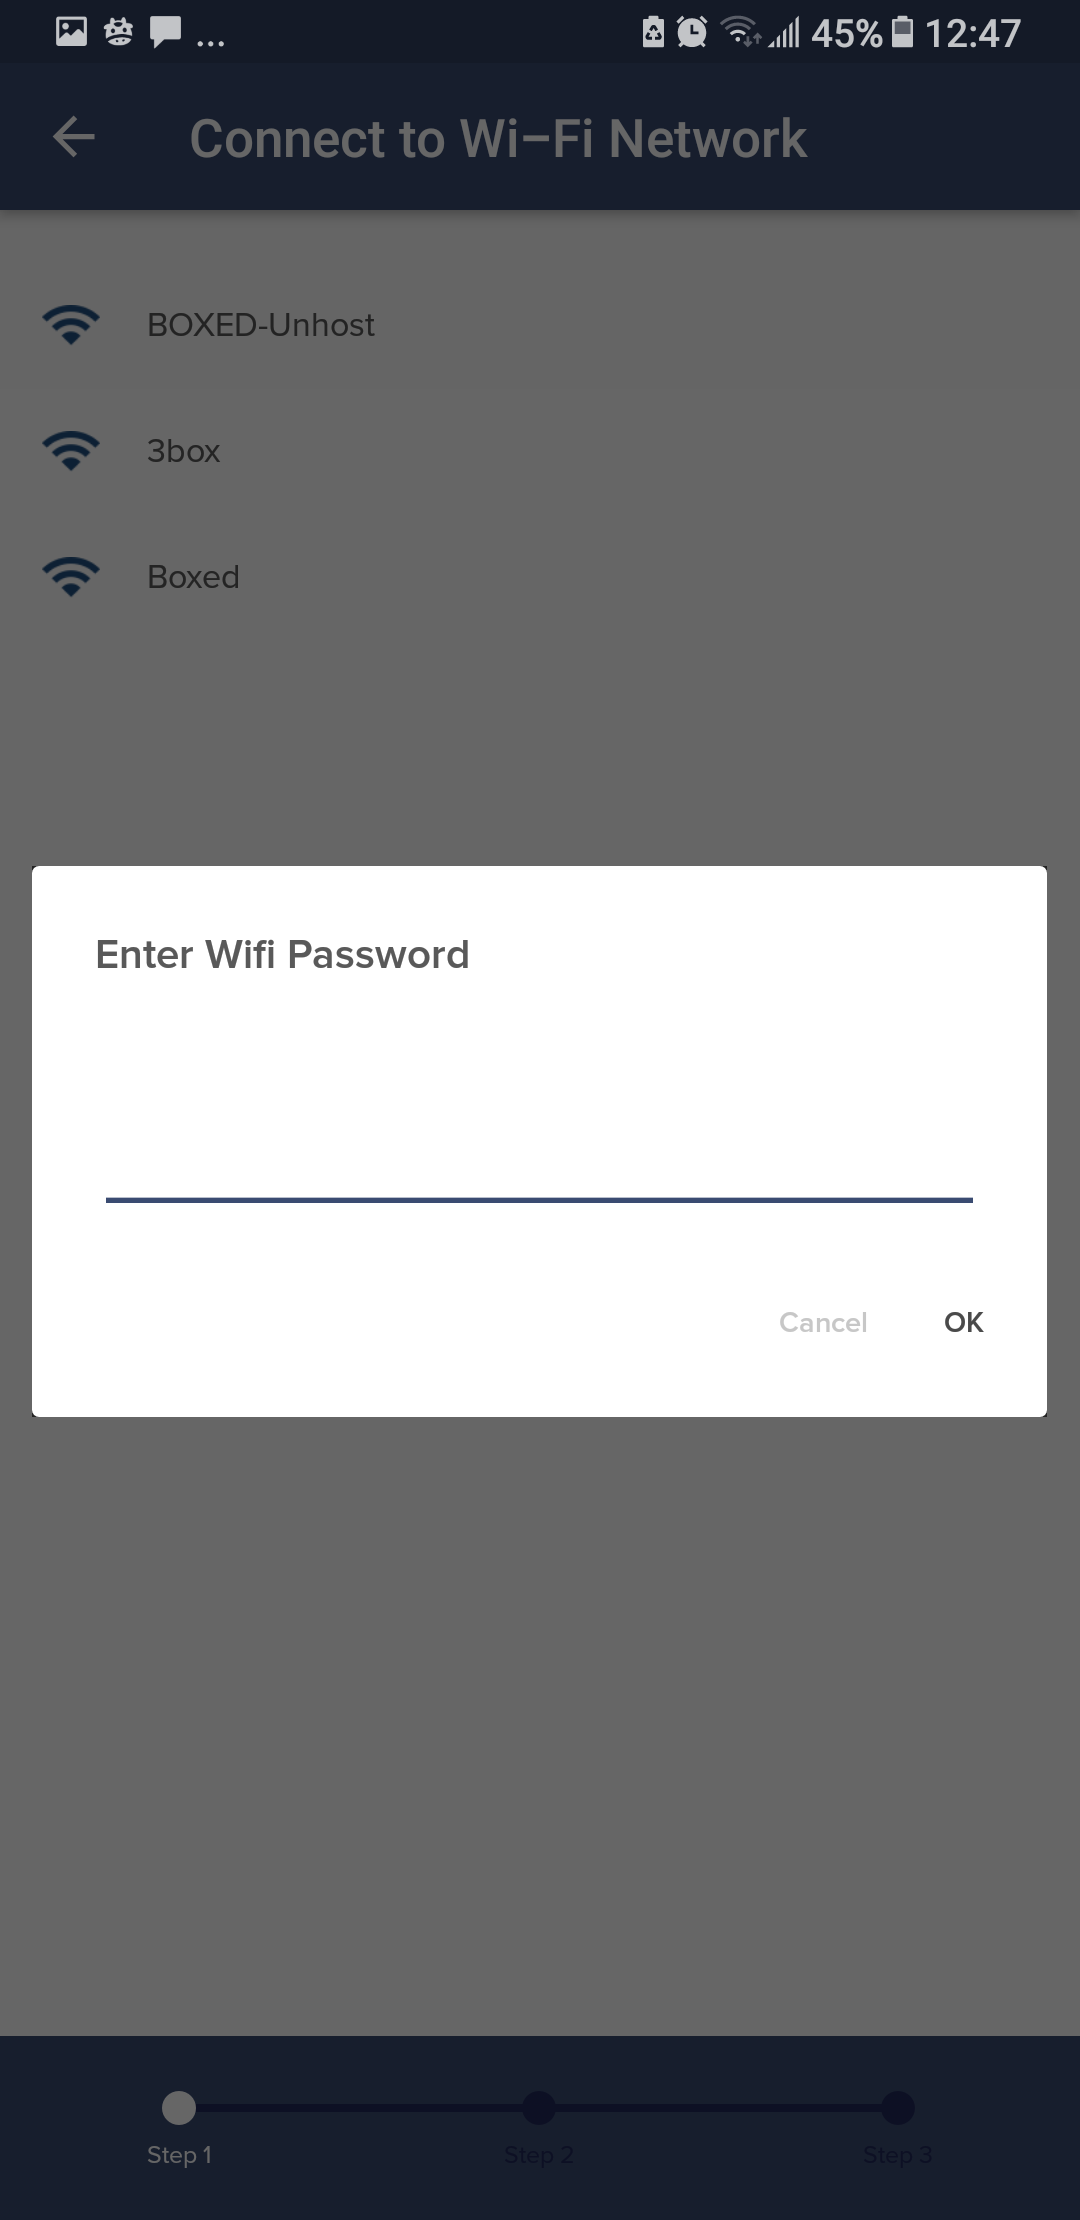
- If the WiFi network you want to connect to has a password, you will need to enter this password.
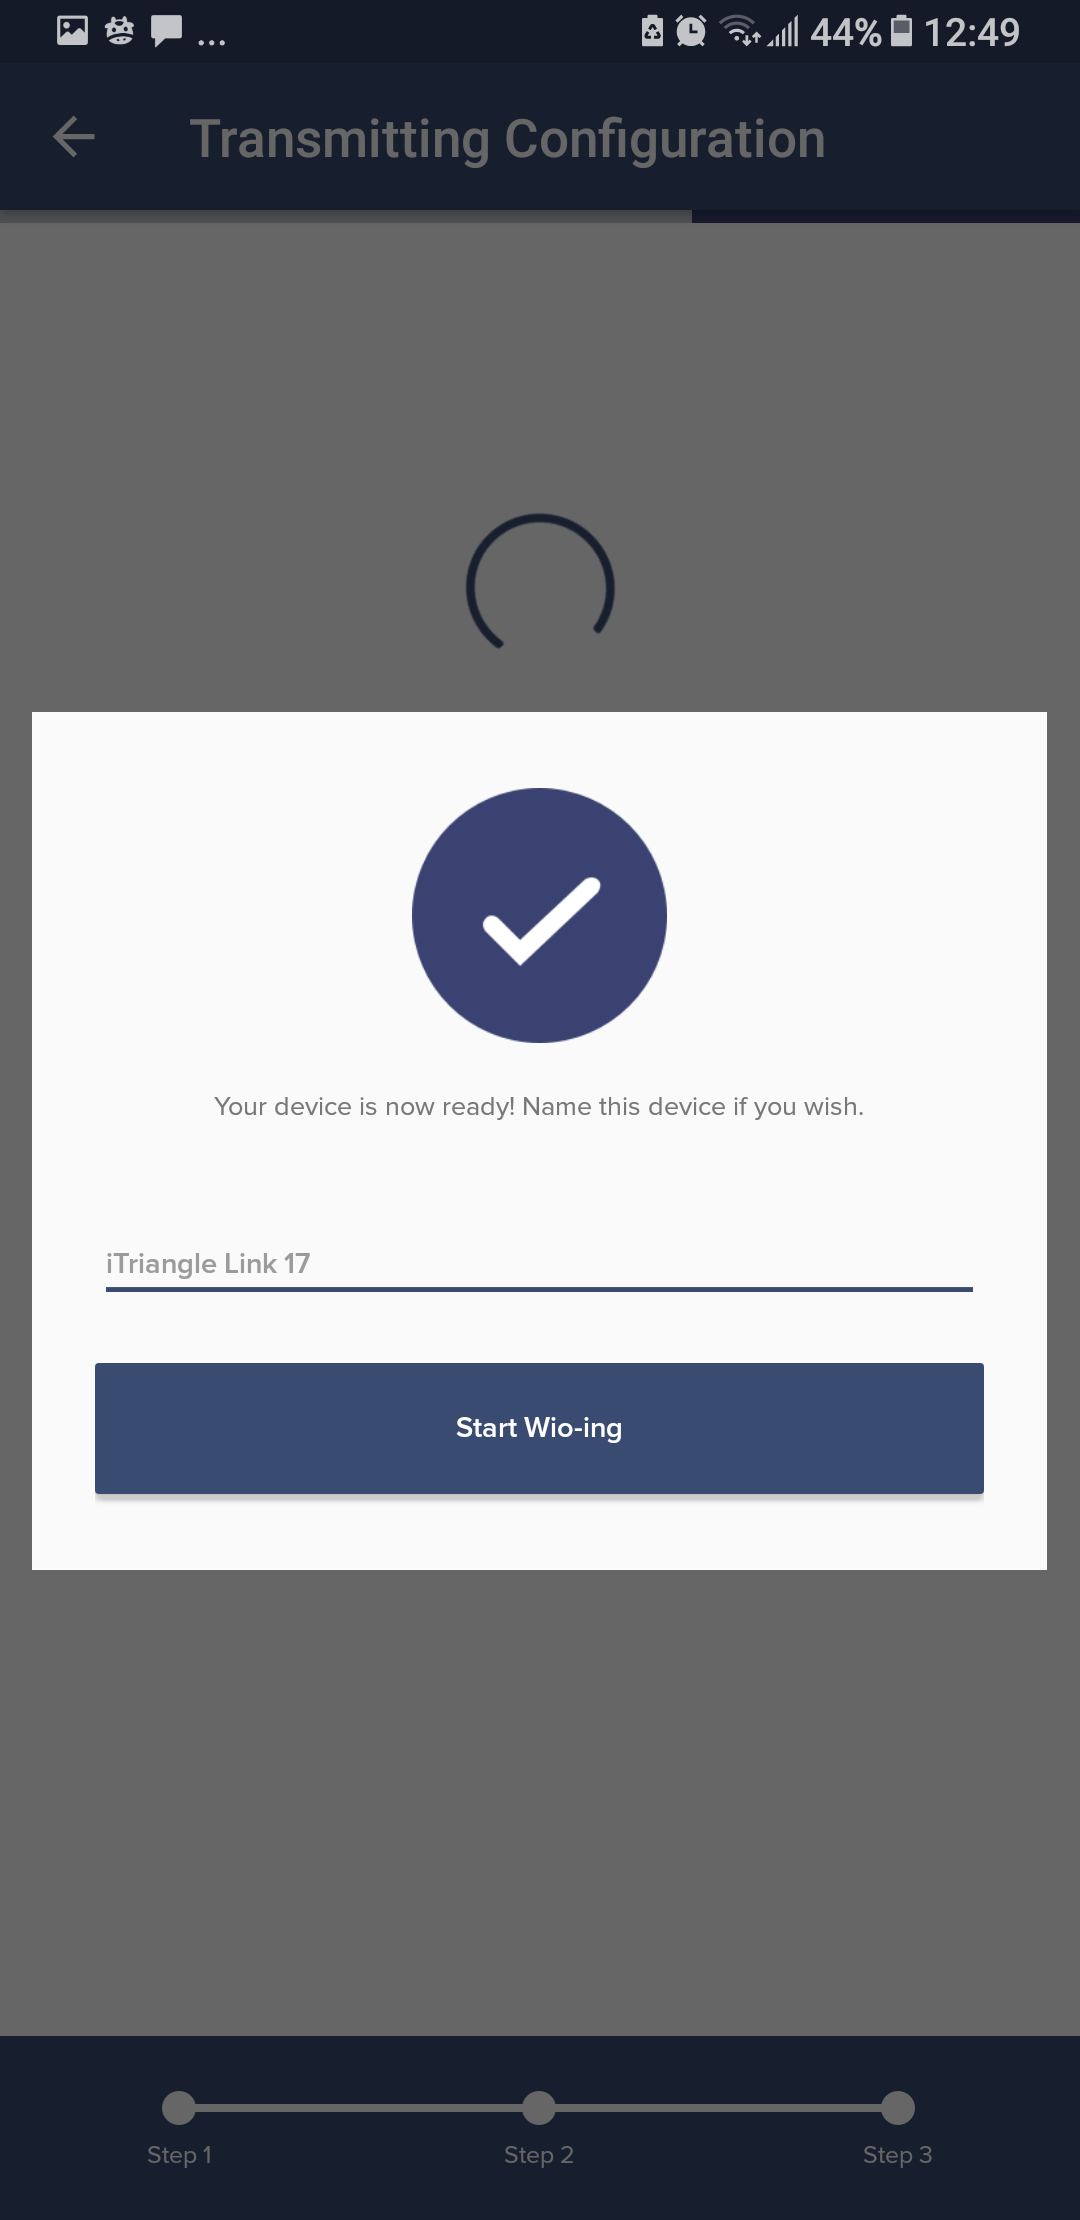
- Consider that you may need to connect more than one iTriangle device in the future. A special name will let you distinguish them from each other easily.
 |
 |

|
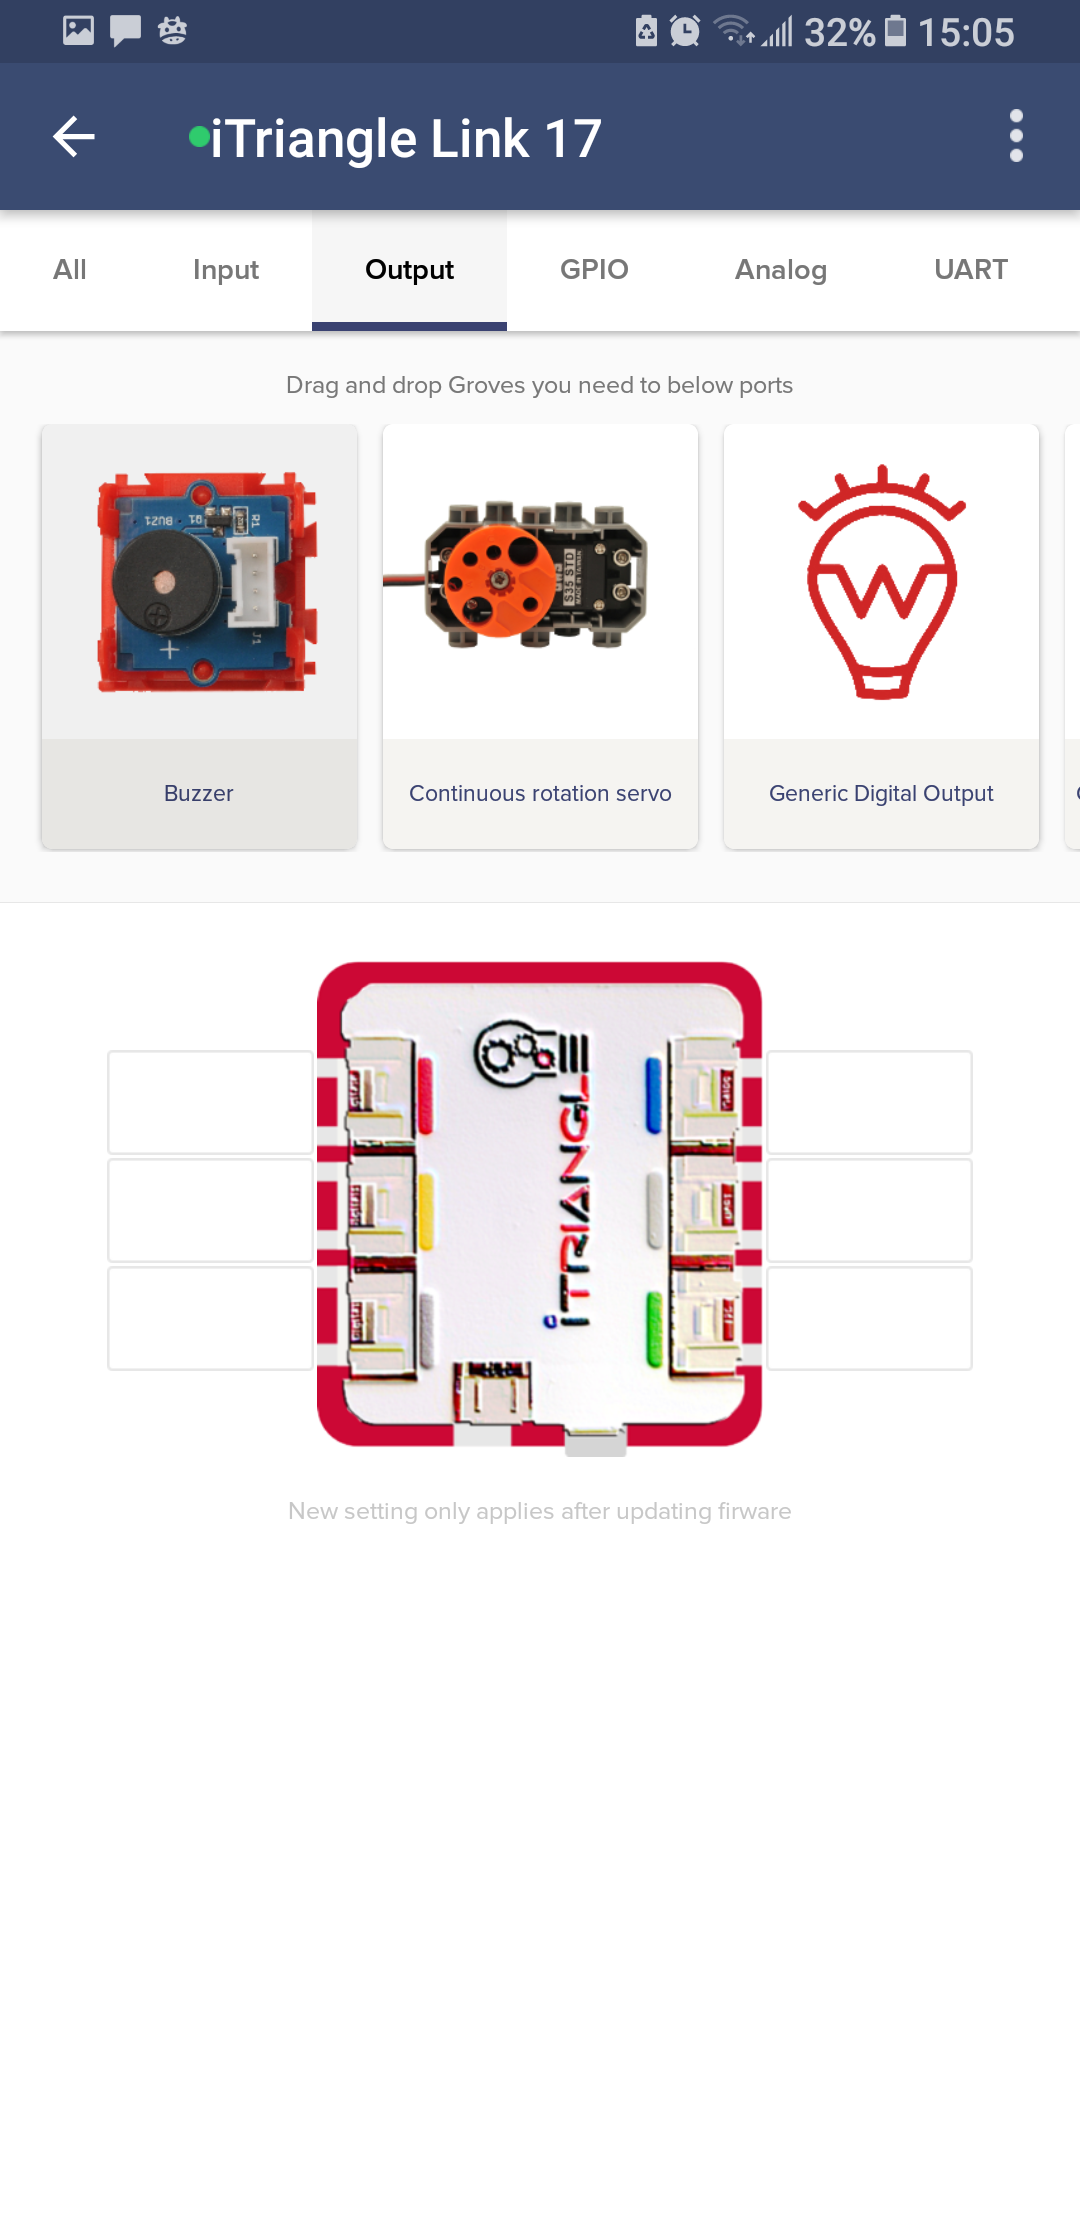
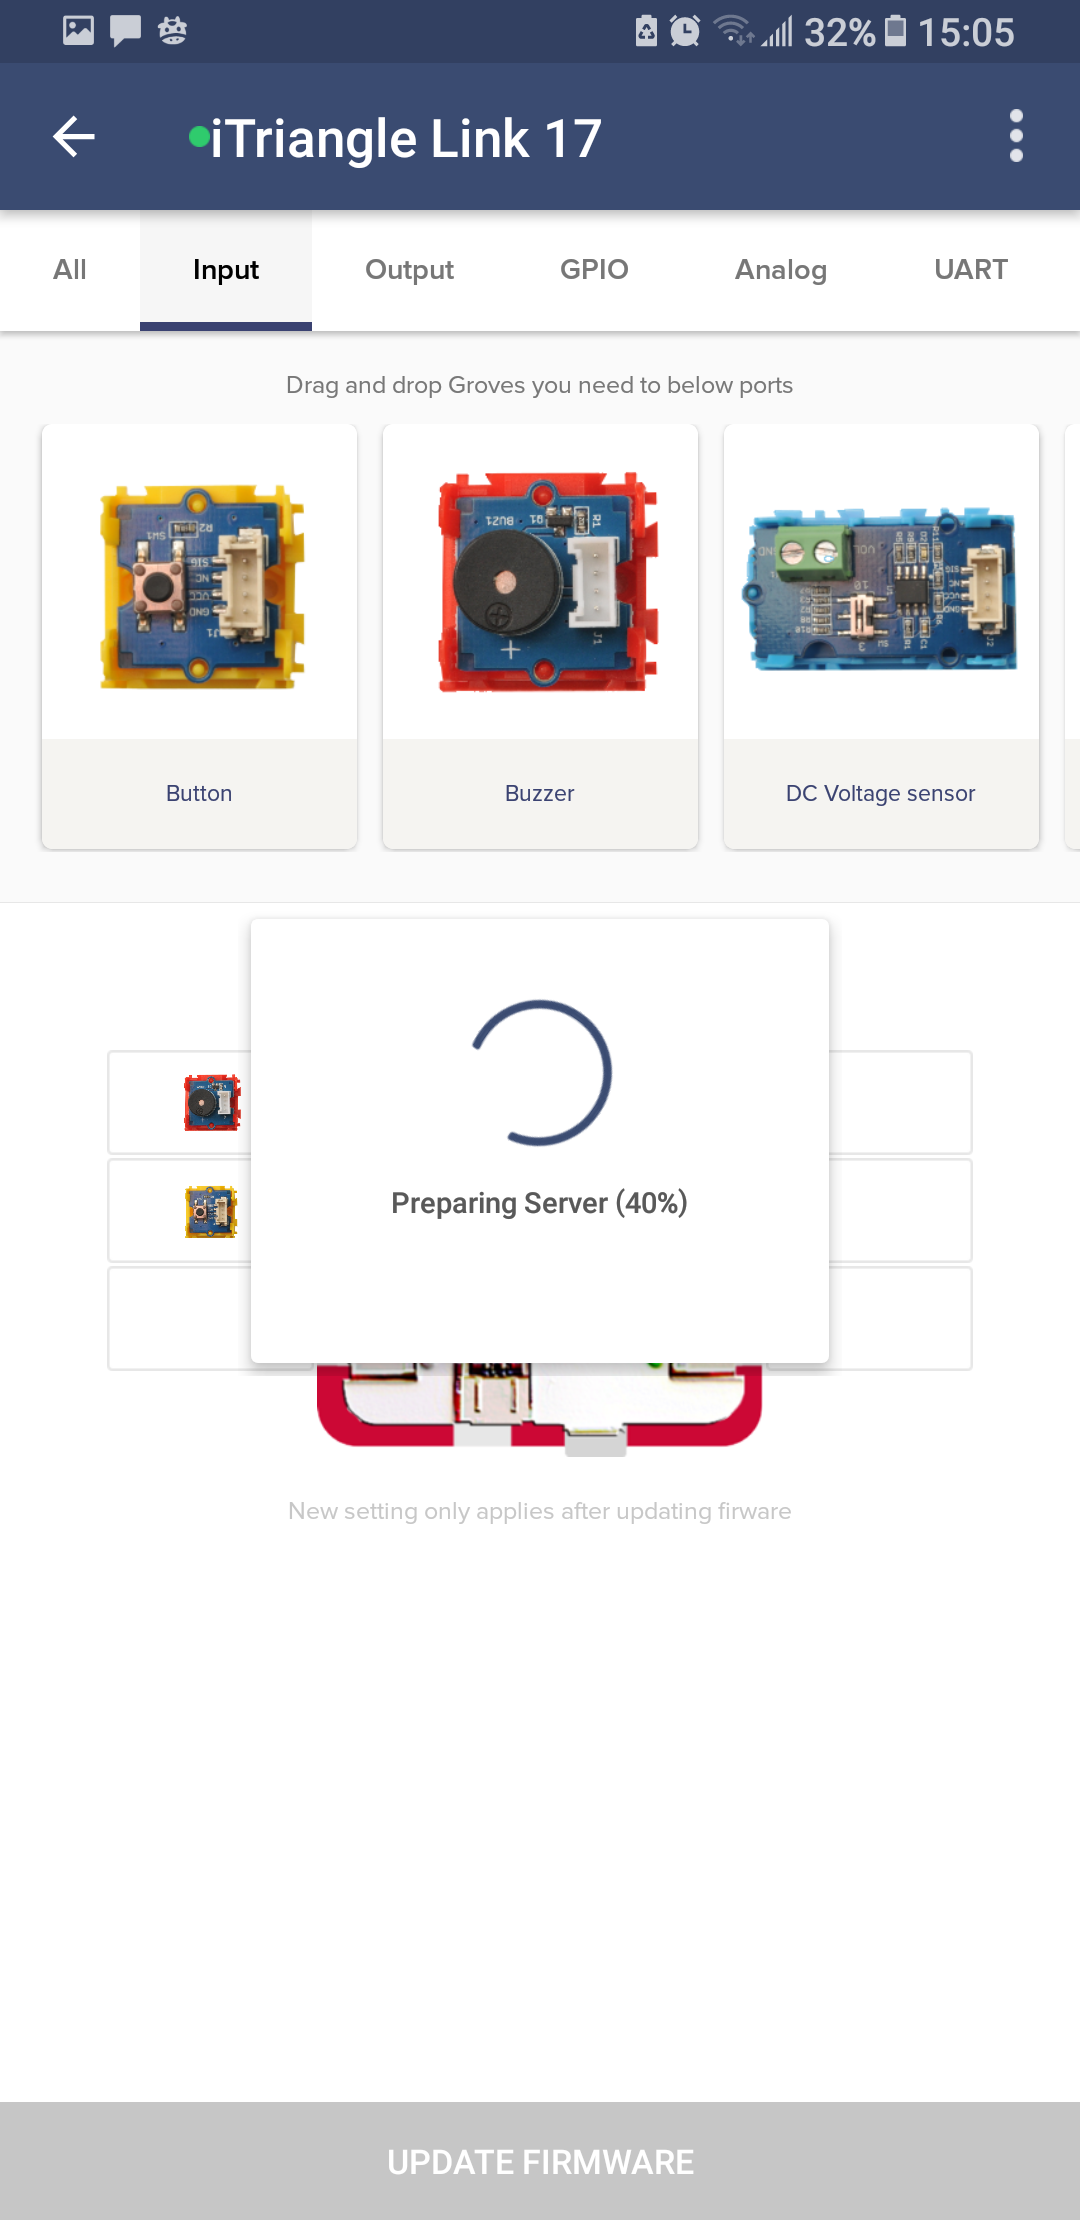
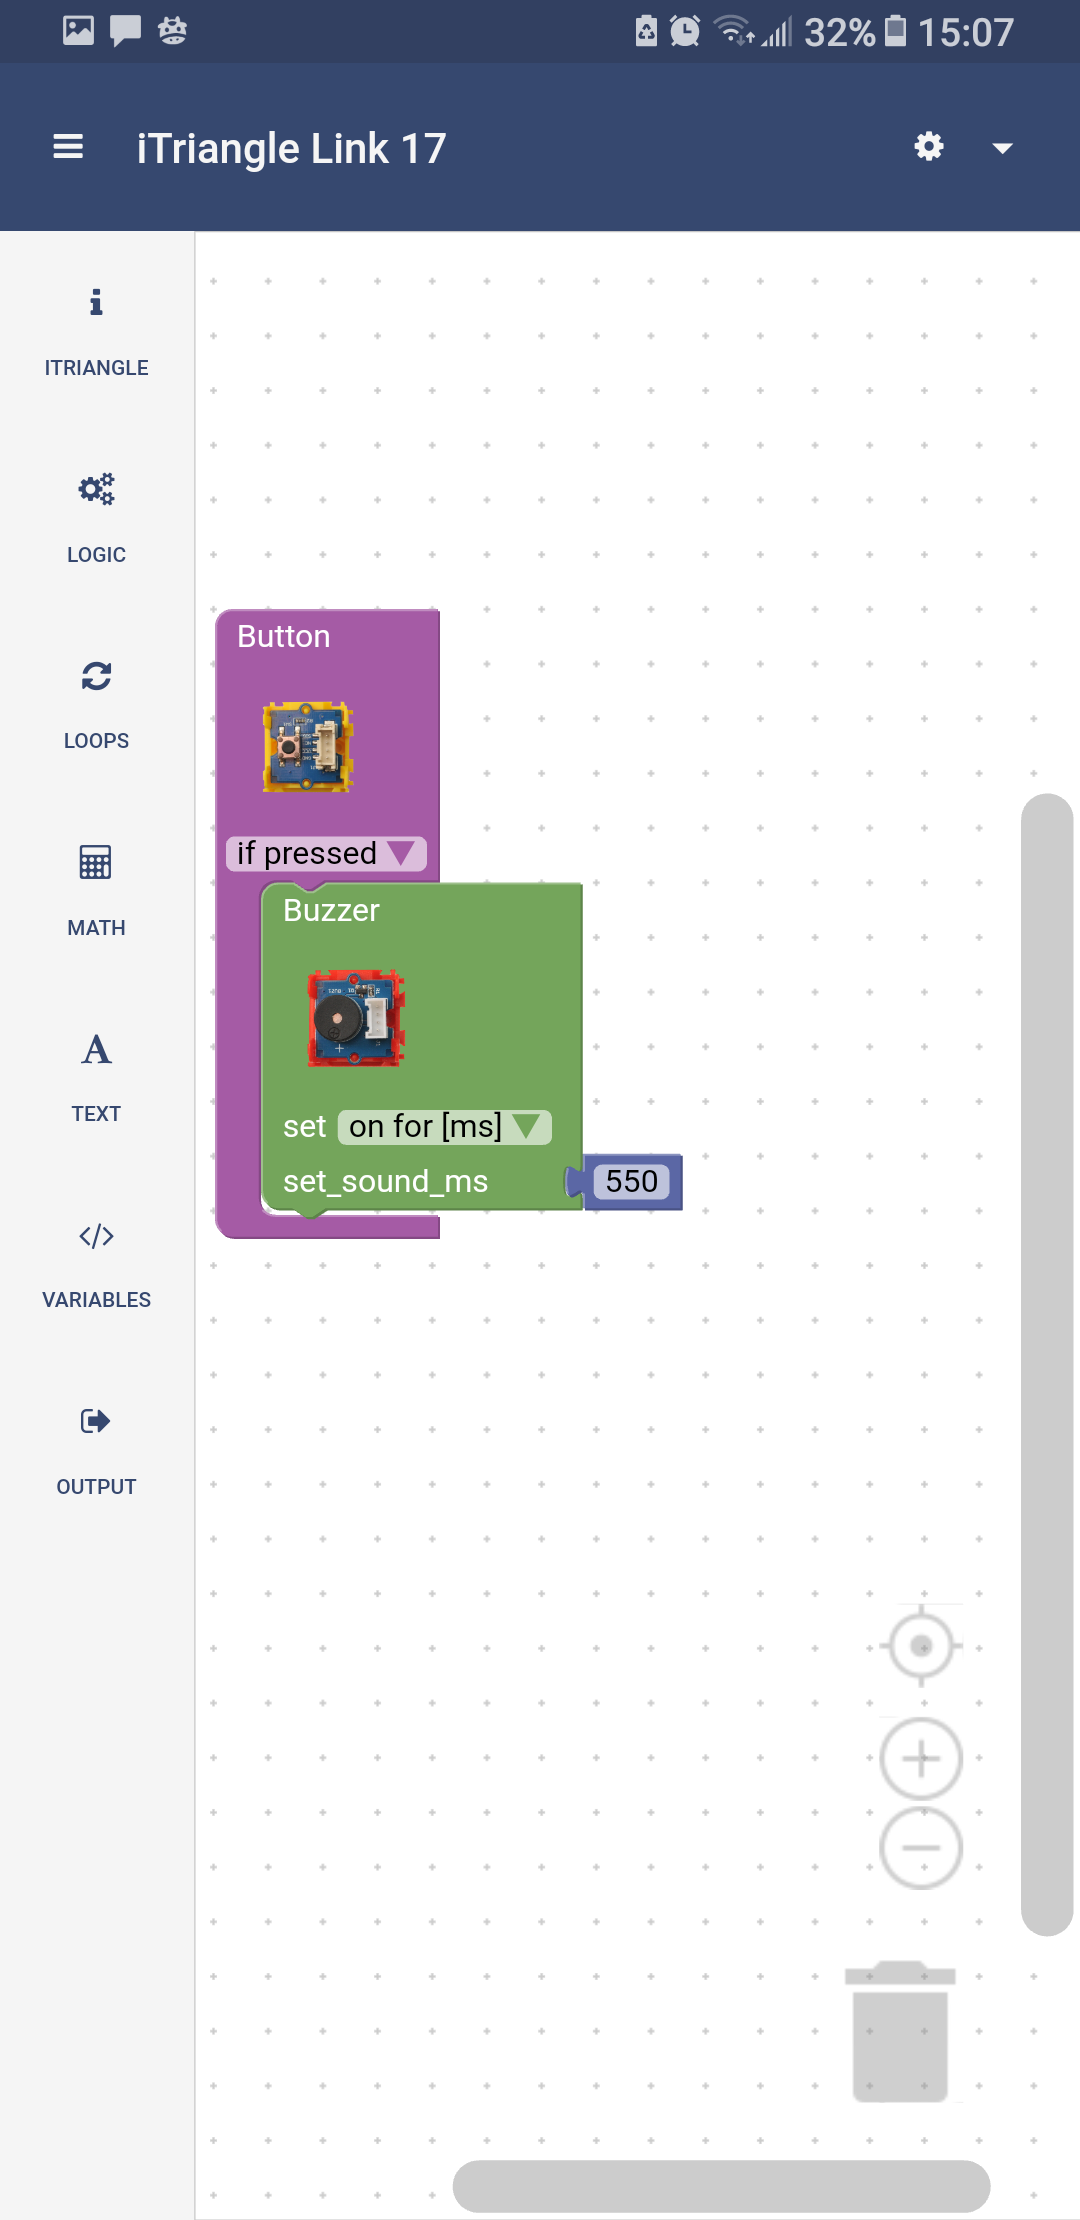
STEP 4: Virtually interconnect modules with iTriangle and update firmware
In this example, we demonstrate a simple scenario with the buzzer and push button switch
- Click on the "iTriangle" button and you will be in the main interface.
- Six grove connectors will be displayed. Select the first one on the left.
- Because the buzzer is an output device, select the output category.
- Find the red icon with buzzer and select it. Drag and drop it onto the iTriangle port.
- Do the same with the Push button switch. The switch is an input device with a yellow icon. Drag and drop it onto the iTriangle port.
 |
 |
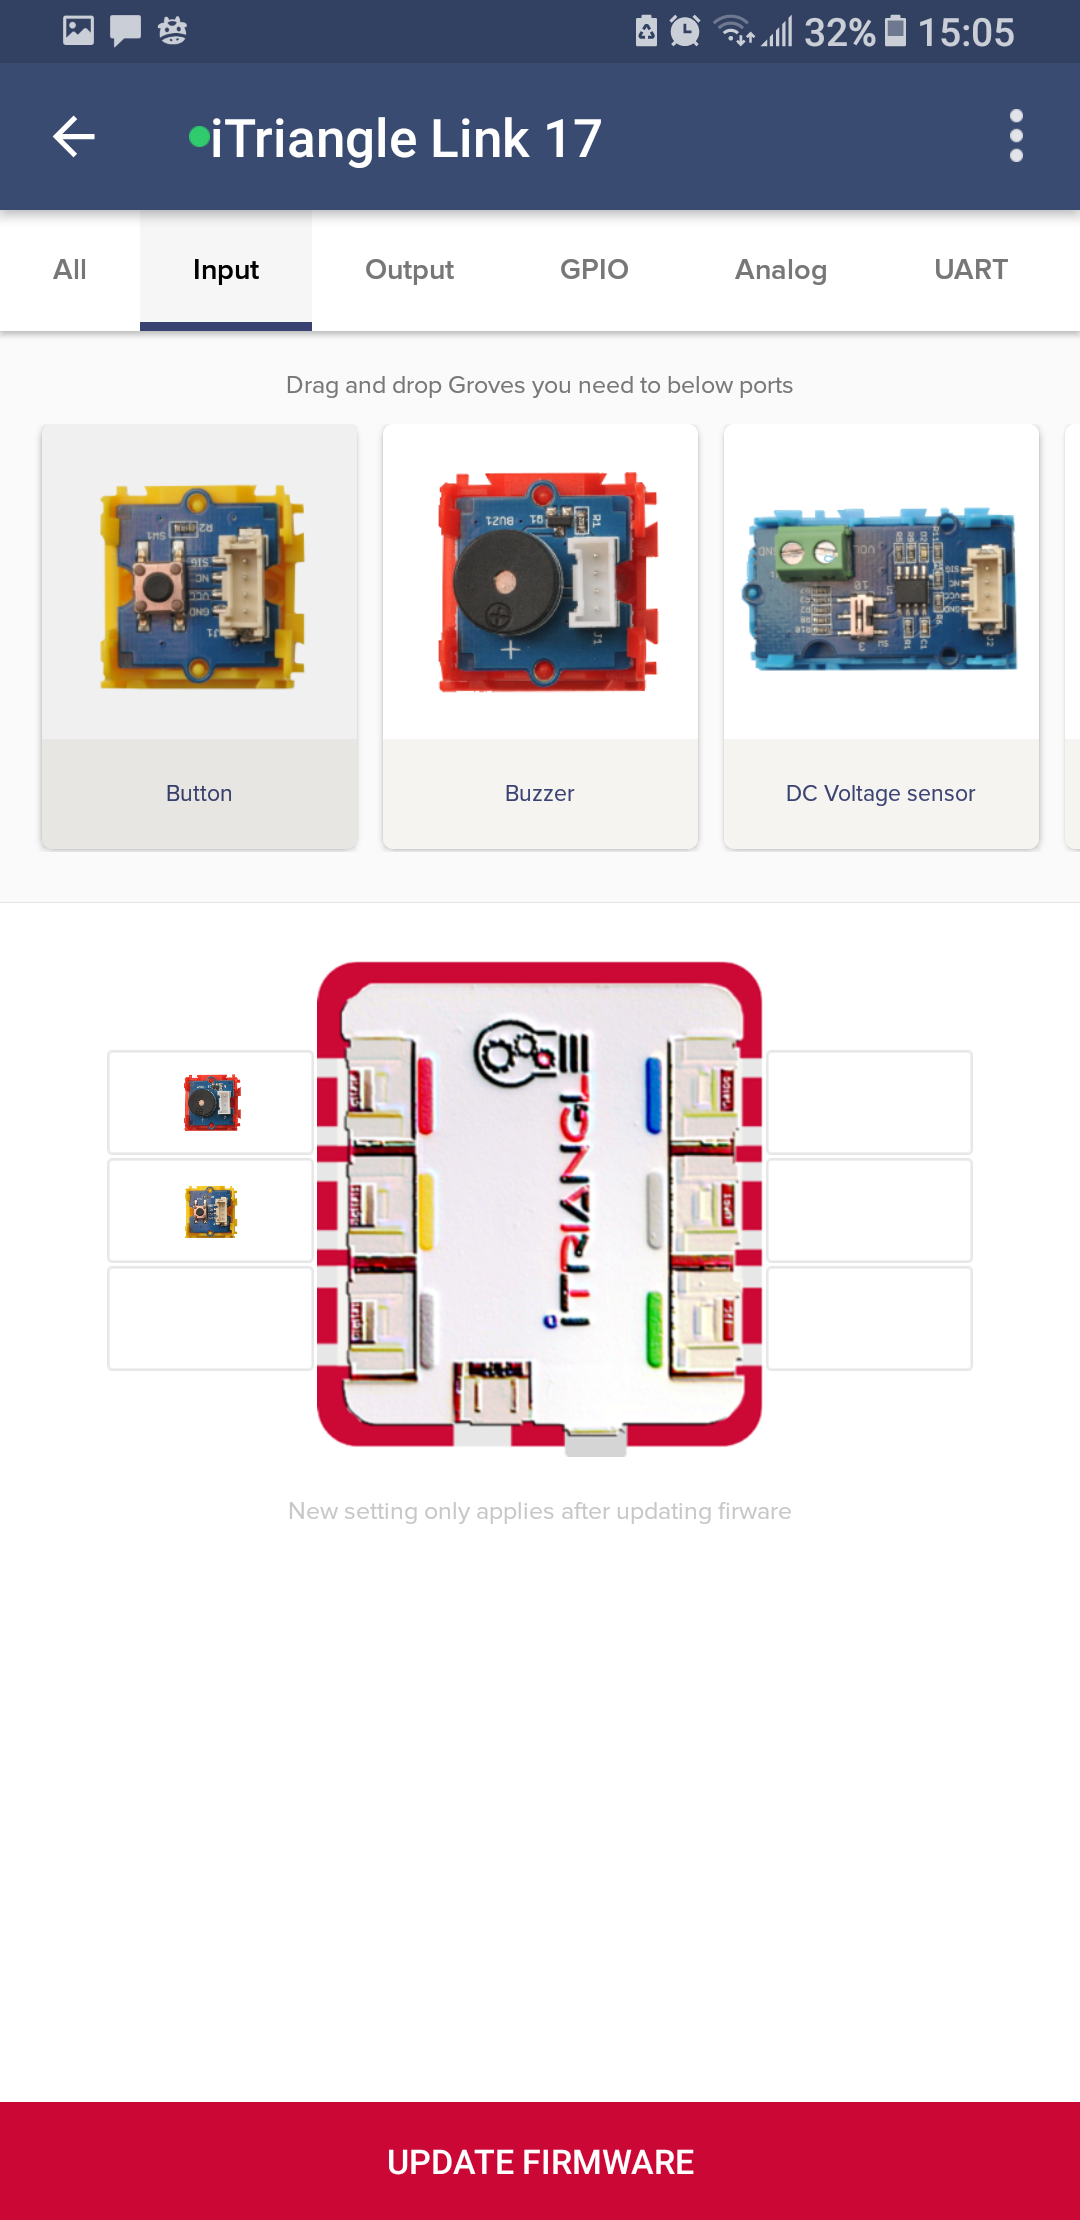 |
A red rectangular button at the bottom will then display "Update Firmware". Select "Update Firmware".
 |
 |
 |
STEP 5: Start using iTriangle at code.itriangle.cz
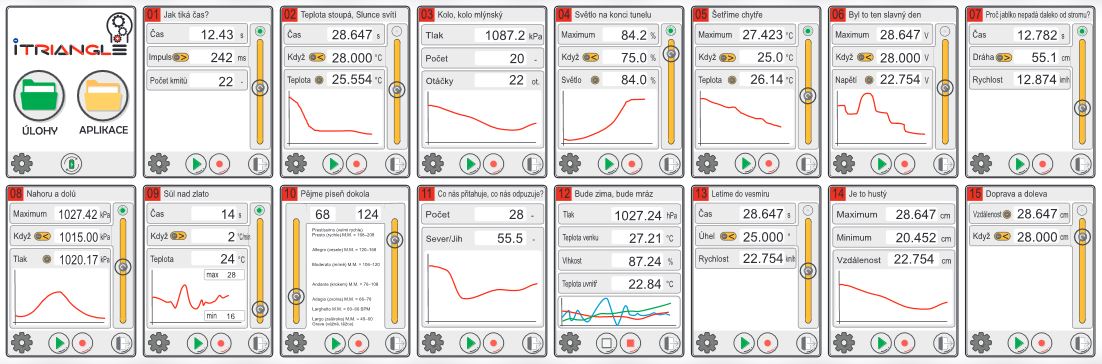
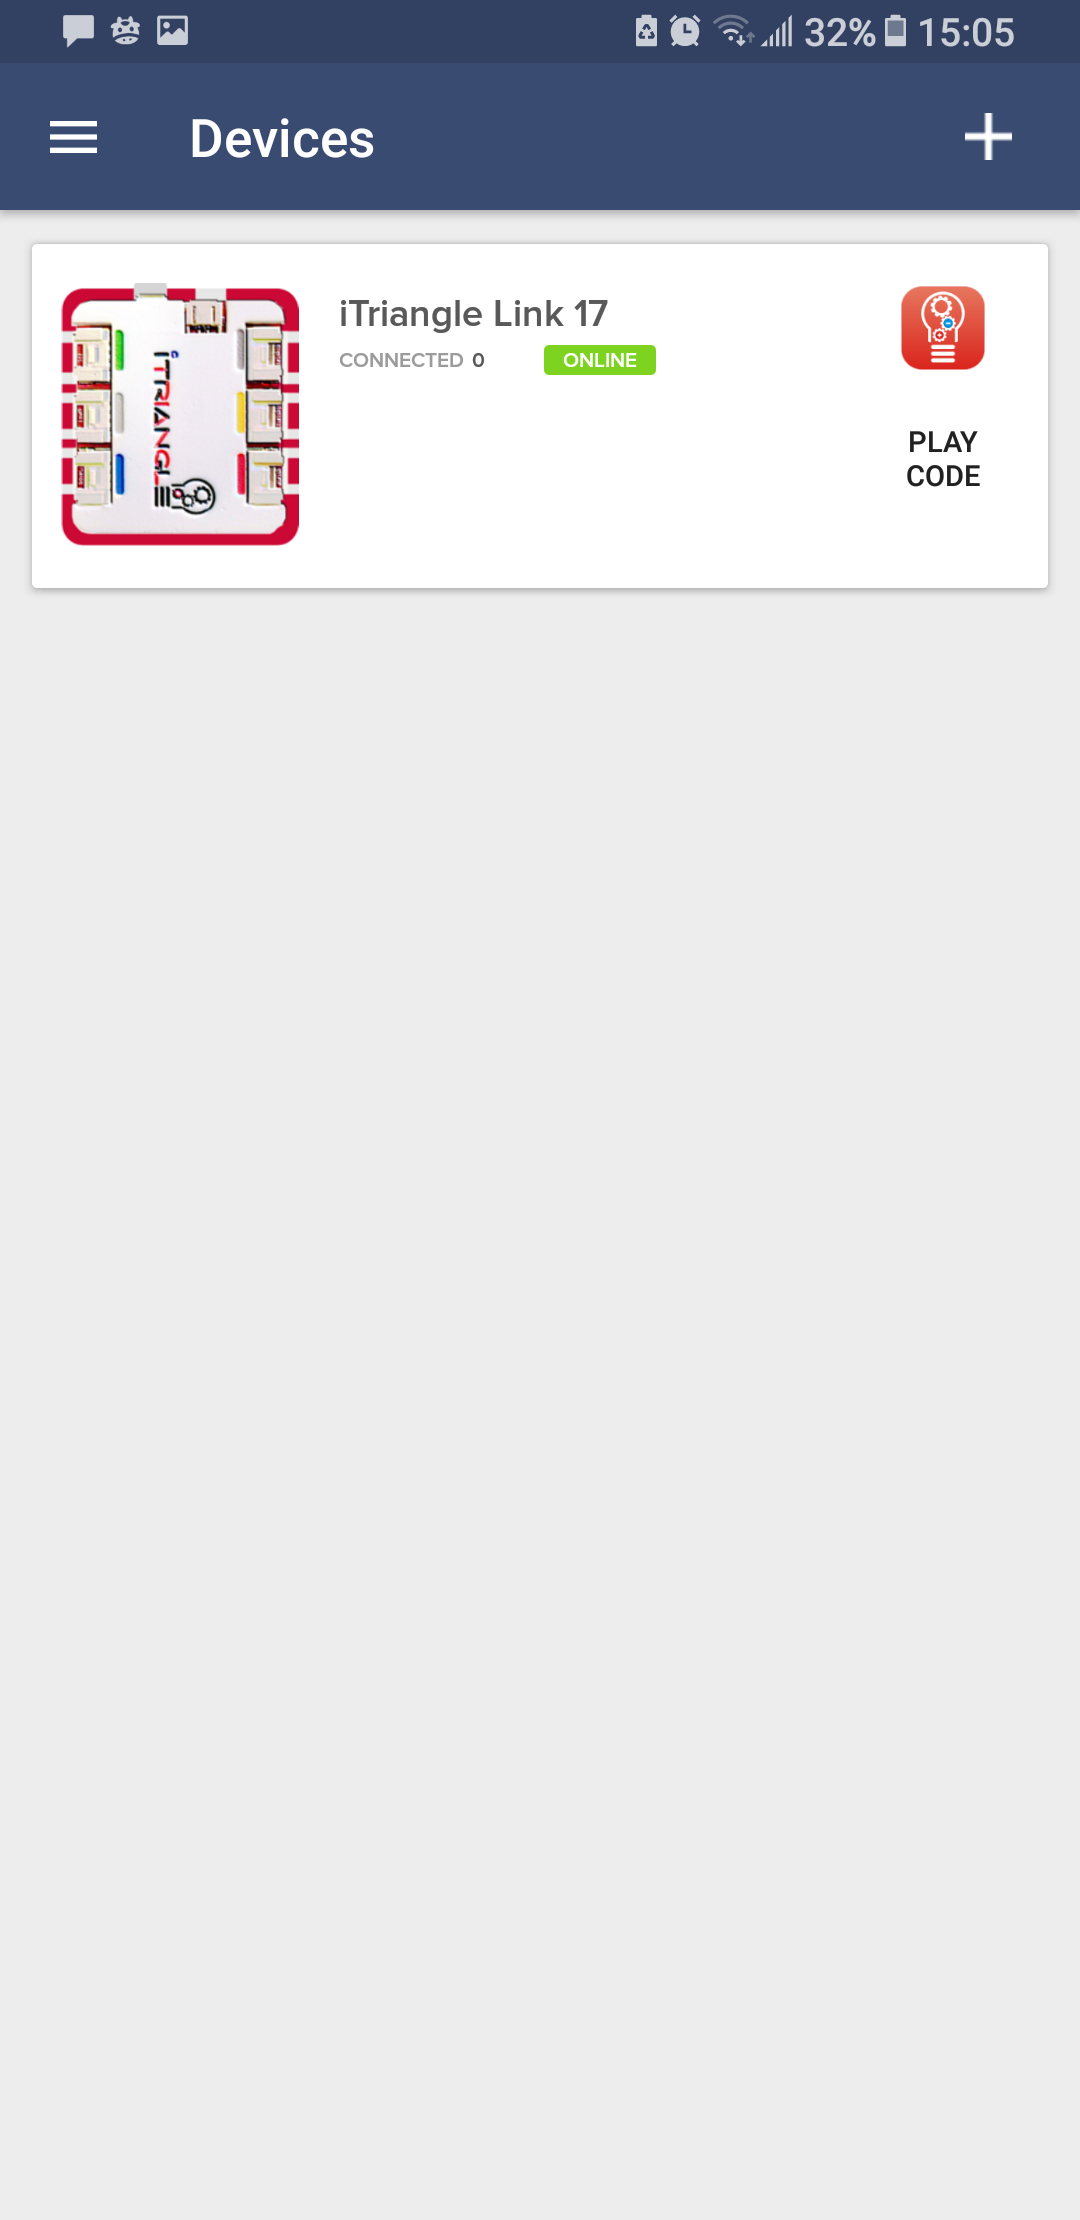
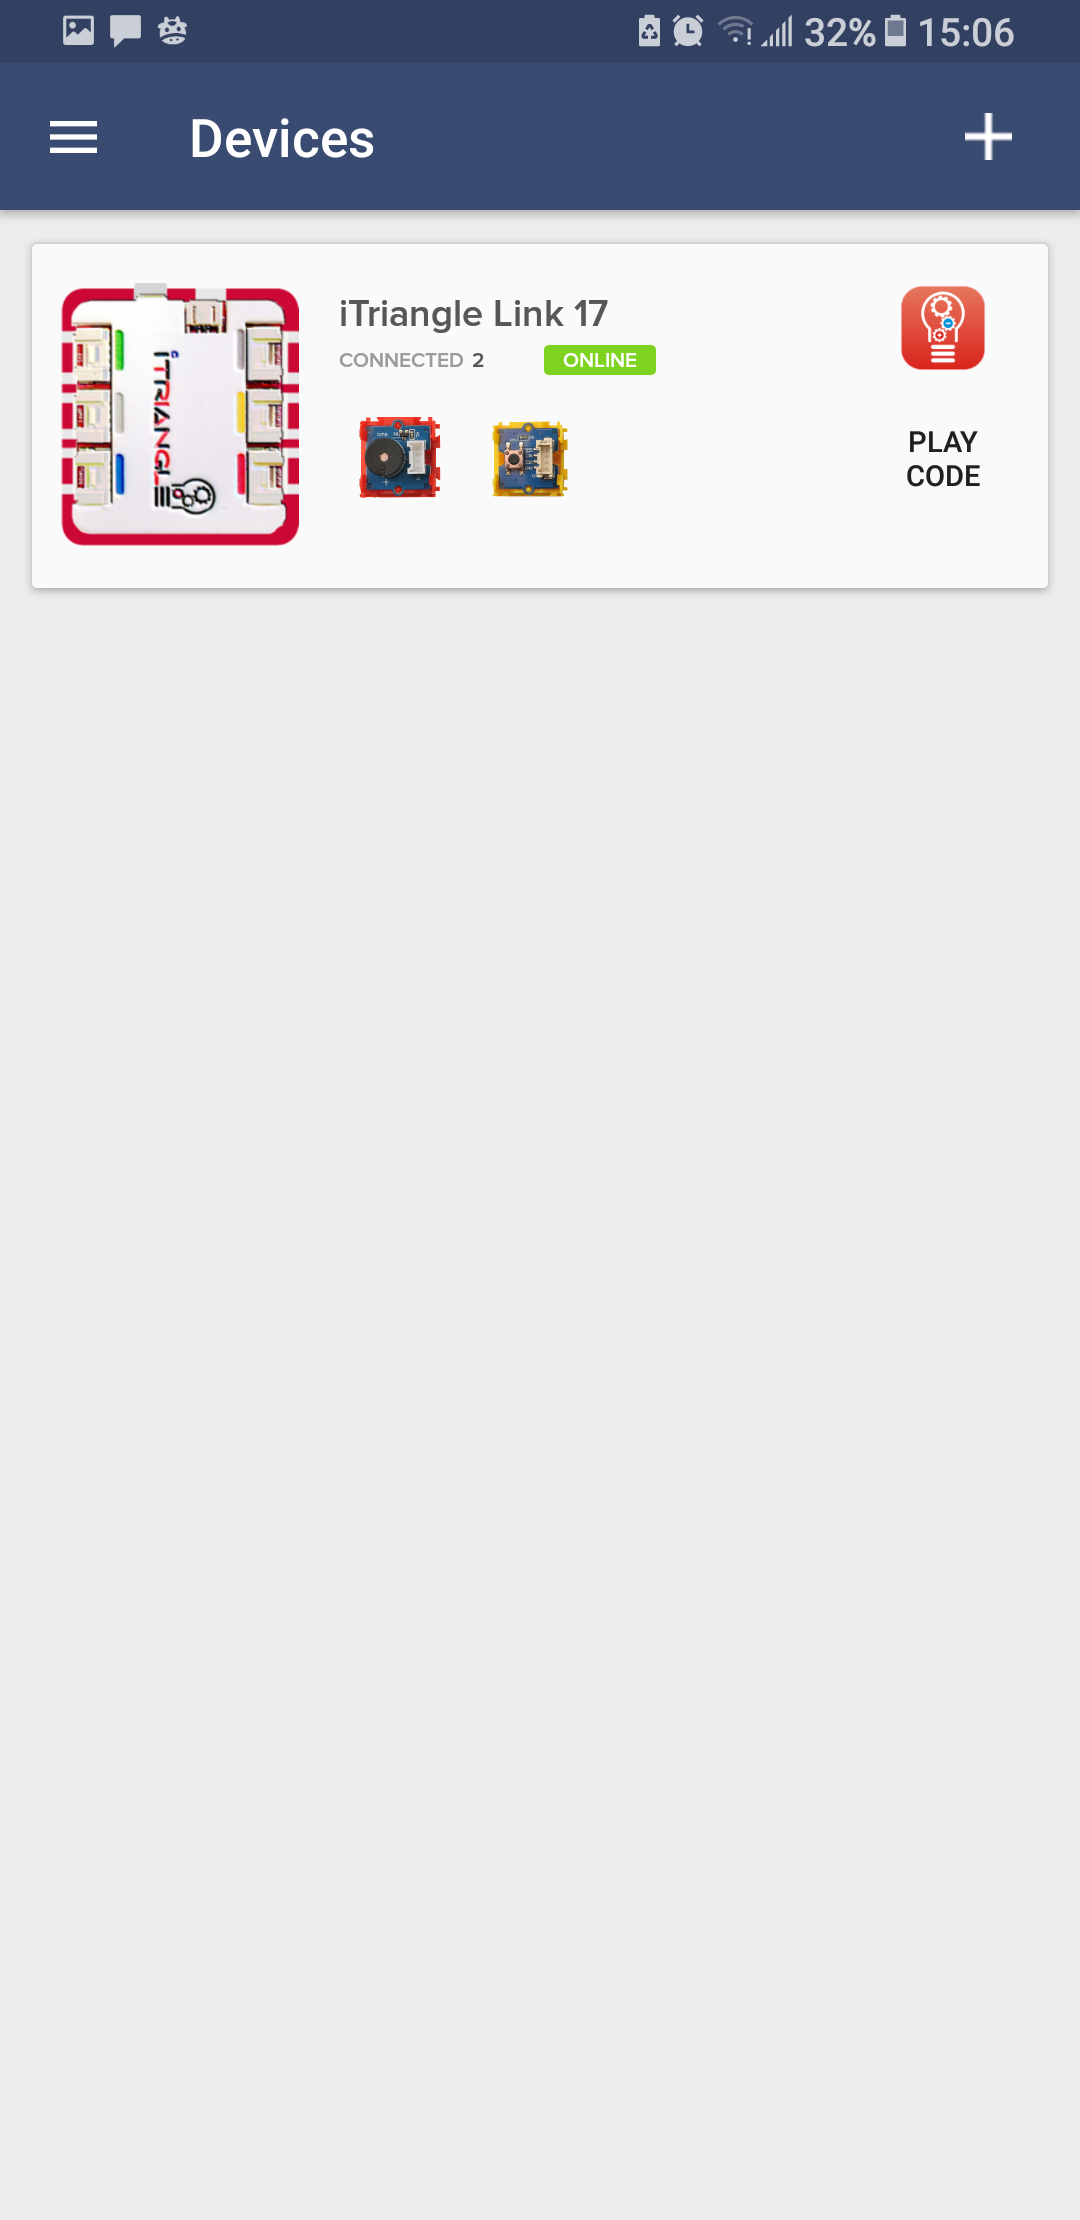
Now that you have successfully connected the Push button switch and Buzzer to iTriangle, click "Play Code" or visit code.itriangle.cz to make new programs, experiment with prepared lessons and measure connected sensors.
Create new code, play with sensors and components, measure sensor values and read through prepared lessons at code.itriangle.cz
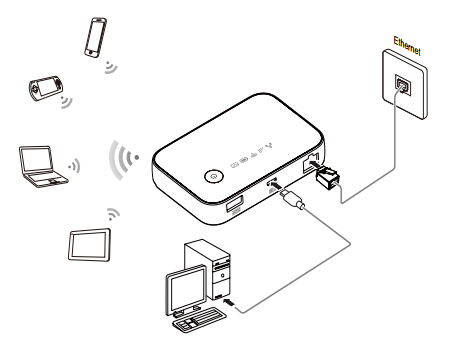
How to operate the Huawei E5730s 3G/Ethernet/Wifi router
Scenario 1: Accessing the internet using a WCDMA or GSM network
Mobile WiFi supports WCDMA and GSM networks. After inserting a USIM card into your mobile WiFi device, you
can access the internet in any of the following ways:
Roaming may incur data usage fees. To minimize your data usage, your mobile WiFi's data roaming
function is disabled by default. When your mobile WiFi connects to a roaming network, your data
connection will be disconnected. To re-establish the data connection, log in to the web management
page.
WiFi connection – wirelessly connect your mobile WiFi to other WiFi devices.
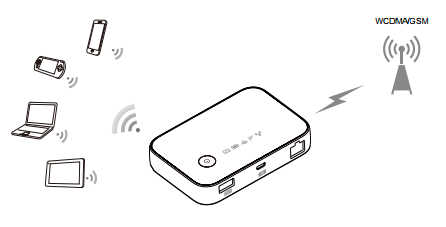
Ethernet port connection (LAN) – connect your mobile WiFi to a computer using a network cable.
USB connection – Connect your mobile WiFi to a computer using a USB cable. Follow the onscreen instructions to install the mobile WiFi driver onto the computer.
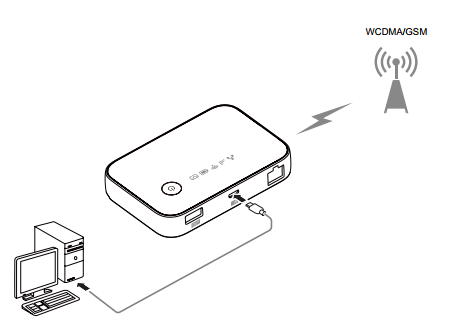
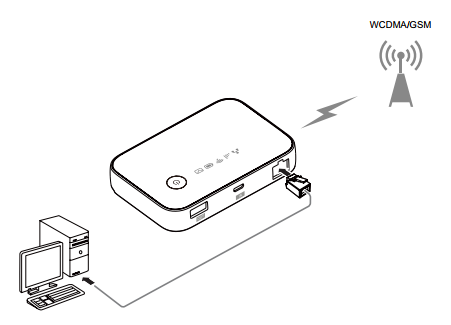
Scenario 2: Accessing the internet using ethernet (WAN)
Connect the mobile WiFi to an ADSL modem or wall-mounted ethernet port for internet access.
Getting to Know Your mobile WiFi device
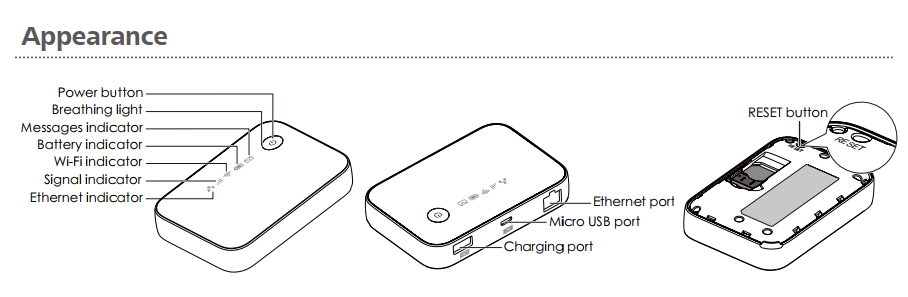
| Item | Description |
| Power button |
Press and hold the Power button until the indicator lights up, indicating that the Mobile WiFi device is switched on. If your mobile WiFi device malfunctions or cannot be properly switched off, press and hold the Power button for at least 10 seconds to force your mobile WiFi device to power off. |
| Breathing indicator | Blinks slowly: The mobile WiFi device is in standby mode |
| Messages indicator | • Green – new message • Blinking green – inbox full |
| Battery indicator | • Green – battery sufficient • Blinking green – charging • Orange – adequate battery level • Red – low battery • Blinking red – Battery level extremely low. Charge the device immediately |
| WiFi indicator | Green: WiFi switched on |
| Signal indicator | • Green – strong signal • Orange – weak signal • Red – no signal |
| Ethernet indicator | • Green – an ethernet connection is established • Blinking green – indicates whether the ethernet port is working in WAN or LAN mode |
| Ethernet port | • Connection to a router • Connection to a computer |
| Micro USB port | |
| Charging port | |
| RESET button | If you forget your user name, password or SSID, you can restore the settings on the web management page to their factory values. To do so, simply press and hold the RESET button until the mobile WiFi device restarts. |
TODO How to change WiFi network over Android/iOS APK
FAQs
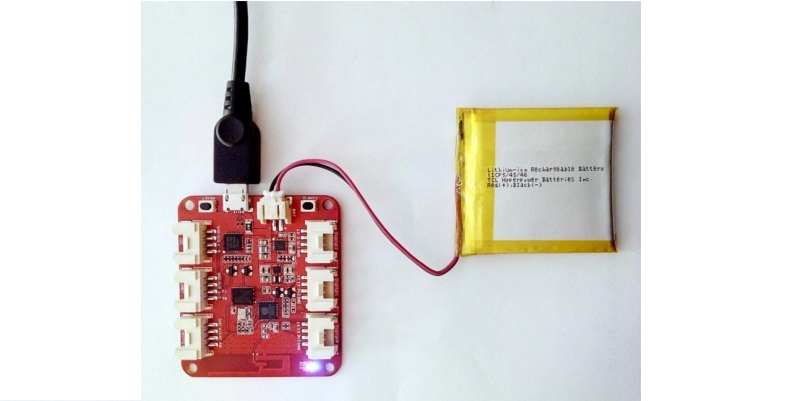
1. Switching on/off and charging iTriangle online
The iTriangle online unit has an integrated battery. Switch the unit on by plugging in the cable as shown in the picture below. The red LED will light up when the iTriangle online unit is powered.
 |
 |
Recharge the battery by connecting the battery as shown above and plugging the unit into the charger via the micro USB connector as shown below.

Note: downloading new programs onto the iTriangle online unit may not be possible if the battery is not sufficiently or fully charged.
2. How to work with the construction kit – basics
3. Server code.itriangle.cz doesn't work properly
Restart and clear your internet browser's cache (some tips on how to do this can be found here).
4. Programs cannot be downloaded to the iTriangle online unit
Make sure your iTriangle online unit is switched on (red LED is on) and connected to WiFi (blue LED is blinking slowly – "breathing"). If both LEDs are operating correctly, try recharging the battery. If the battery is insufficiently or not fully charged, communication between the iTriangle online unit and code.itriangle.cz may not work properly.